Maintain the High-Pressure Fittings
Nipples contain small caps to protect the threading and keep debris from entering the high-pressure plumbing during shipment. Remove the caps before assembling the high-pressure plumbing fittings. Do not use pliers to remove the black caps or cut the black caps from the nipple. Pliers and knives can damage the nipple threads causing leaks and water damage.
When preparing the ProtoMAX high-pressure tubing, it is important to follow instructions. Some high-pressure tubing and fittings are pre-assembled. Fittings may need readjustment during installation to make sure proper seals and eliminate potential leaks. Use the provided stand-off tool to make sure the fittings are correctly seated and sealed.
High-pressure fitting connections are located on the ends of the high-pressure nipple at the back of the machine. The high-pressure fittings consist of the following components.
![]()
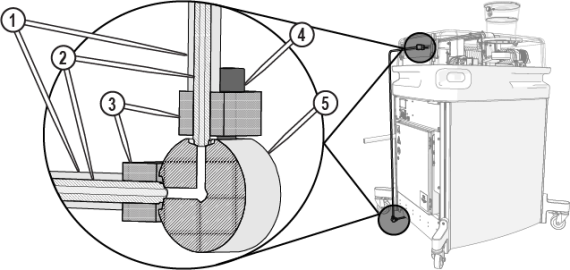
Figure 808
| [1] Conduit | [2] High-pressure nipple | [3] Bar clamp | [4] Bar clamp screw (x 2 per bar clamp) | [5] 90-degree fitting |
| 1. | Thoroughly clean all high-pressure components before disassembly. |
| 2. | Release any pressurized water from the high-pressure lines, see Prepare the High-Pressure Lines for Repair. |
Always loosen the high-pressure bar clamp screws evenly (1/4–1/2 turn at a time). Unevenly loosening the fitting can damage the tapered nipple or concave fitting and can cause leaks in the high-pressure fitting.
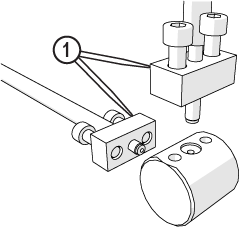
| 3. | Remove the bar clamp [1]. |

| 4. | Replace the component and reassemble high-pressure connections. |
If replacing the high-pressure nipple at the nozzle or pump, see High-Pressure Gland Nut Assembly.
| a. | Place the high-pressure line [2] in the conduit [1] (Figure 810). |
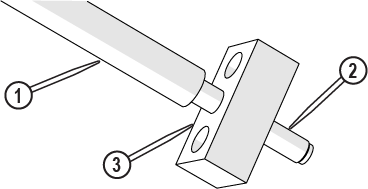
| 5. | Seat the high-pressure nipple [1] into the high-pressure fitting [2] and secure with the bar clamp and screws. |
![]()
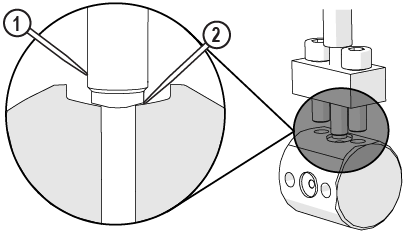
Figure 811
| 6. | Tighten the bar clamp screws [1] evenly. |
Always tighten the bar clamp screws evenly (1/4–1/2 turn at a time) to the correct torque to make sure the high-pressure nipple seats correctly. Do not overtighten the bar clamp screws. Over tightening the screws can damage the high-pressure nipple tapered edge or the concave high-pressure fitting and damage the high-pressure seal. Damaged high-pressure seals can cause the connection to leak.


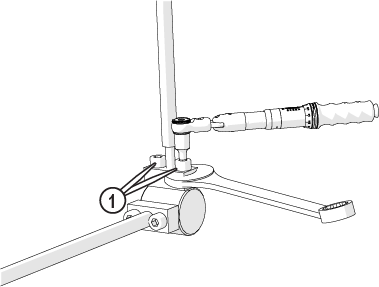
Figure 812
There is a small, even space [1] between the bar clamp and the high-pressure fitting when correctly torqued.
![]()
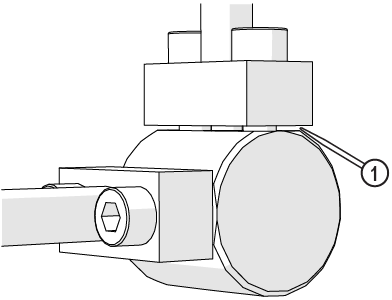
Figure 813
| 7. | Flush the high-pressure plumbing, see Flush the High-Pressure Plumbing. |
| 8. | Reset the pump, see Reset the Pump. |
| 9. | Install the nozzle, if removed, see Install the Nozzle, perform a nozzle test, and see Test the Nozzle. |