
________________________________________
Create Bridge
A bridge connects small parts together to prevent them from falling or floating away

A "bridge" is similar to a tab, except that a bridge connects individual parts to each other; a tab connects each part to the material). Like a tab, a bridge prevents parts from falling into the tank or floating away.
To create a Bridge:
1) Right-click the lead i/o button and select Create Bridge to display the three Bridge Setup buttons:

Click Options to display the Bridge Entities dialog:
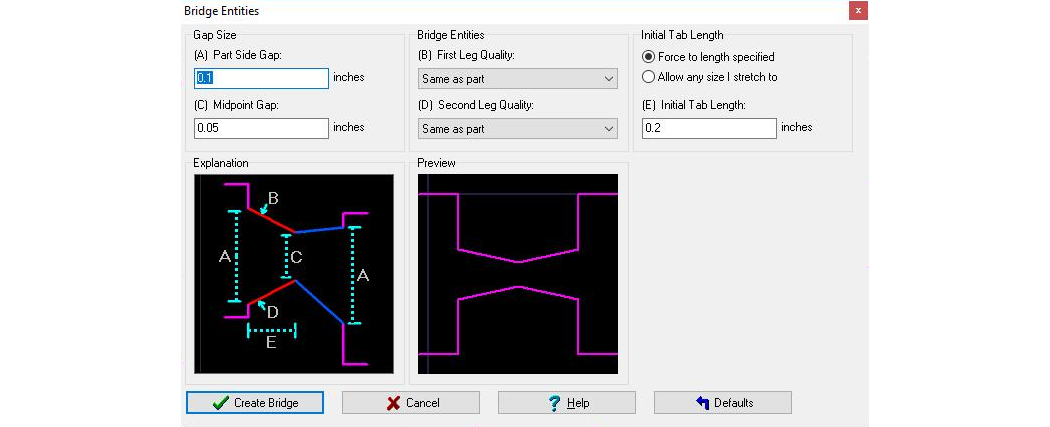
- Part Side Gap
The width of the bridge at the part measured in the current units.- Midpoint Gap
The width of the bridge at the connecting point for the legs from each part, measured in the current units. (Typically, the Midpoint will be the narrowest section of the Bridge, but there are cases where you will want the break to occur at the part, not in the middle. In this case, the Midpoint gap will be the widest section of the bridge.)- Leg Length
The length for the first set of legs measured in the current units.
You can select "Allow any size I stretch to" which enables you to stretch the first set of legs to a length you want. If "Force to length specified" is checked, then the length will be what is specified in this dialog regardless of where you have the cursor in relation to the part.- Tab Entities
The cutting Quality used for the legs. Generally, you'll want to use a Quality that cuts through the material, but you do not need a high finish since the bridge will be removed. The "first" leg is based on which leg LAYOUT determines is cut first. Each leg can have a different Quality.- Preview
The Preview illustrates approximately what the bridge will look like.
As you drag the cursor around before clicking the mouse to create a Bridge, notice that the Bridge will 'snap' when you get close to a corner. This helps you avoid creating very small entities which can have a large effect on the cut speed.
Bridges can be angled or straight. The break point can be at the part, or the midpoint, depending on your needs.
See Also
Configure Manual Lead i/o Tool