
________________________________________
Material Setup
The Material Setup menu in MAKE allows you to identify the material being machined and define various cutting parameters.
To access the Material Setup menu, click the button:

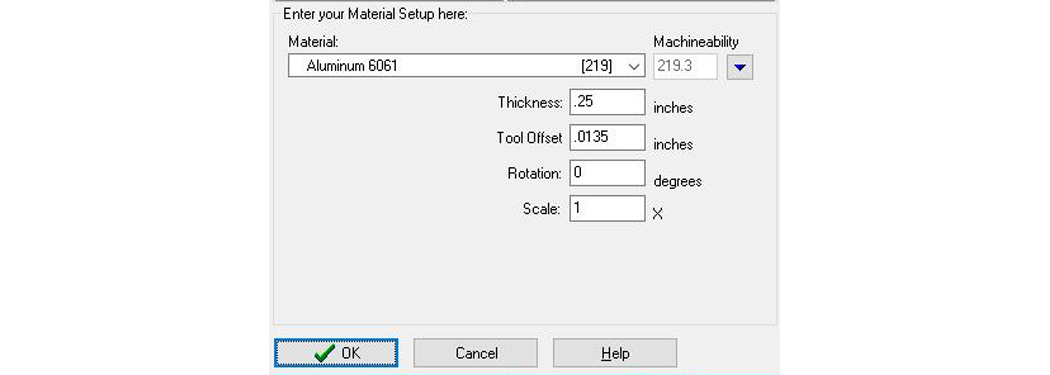
The Material Setup options
Material
Select the material to be machined from the options presented in a drop-down menu. This menu is activated by clicking the down arrow button to the right of the Material field. Select the correct material from those listed:

To view, modify, or add to this list, see "Machineability", below. To view the entire material list, see "Machineability Index".
Materials on this list that are provided as part of the OMAX software cannot be deleted or edited. Only user-created materials that have been added to this list can be deleted or edited. User-created materials appear on the list with a small bullet to the left of their name.
Machineability
This input field displays the machineability value assigned to the selected material. The higher the machineability number, the softer the material.
A custom machineability number can be entered to replace a material's default value by changing the material selected to "<Enter Custom xxxx Machineability:>," where "xxxx" would be the name of the material category (i.e., "Metal", "Glass", etc.), and entering a different machineability value:

To add, edit, or delete a Material, click the down arrow to the right of the current Machineability value. This displays a pop-up menu with these options:

When cutting brittle materials such as stone, glass, ceramics, etc., the machineability index value provided here should be considered as a starting point only. The hardness of these materials can vary significantly within each classified type. It is suggested that their index value be adjusted based upon the results of some initial test cuttings. As an additional note, some expensive and hard stones such as black granite are routinely counterfeited in some countries using a much softer stone which causes them to cut much differently than expected.
Show/Hide Categories
Select Show/Hide Categories to display a pop-up menu allowing you to select the material categories that you want to appear in your list of Materials:

Selected categories display on the Material list; cleared categories do not. Clicking a category in this Show/Hide list selects (adds check mark ü) or unselects it (removes check mark).
Show Machineability Chart
Machineability charts plot each material's machineability value on a horizontal bar graph, beginning vertically with those having the smallest value and ending with those with the largest machineability value.
Select Show Machineability Chart to display a sub menu which lets you select the materials you'd like presented in a chart:

For further information, see the Machineability Chart topic.
Add New Material...
Use this option to include your own materials on the Material list. Clicking Add New Material displays the following pop-up menu:
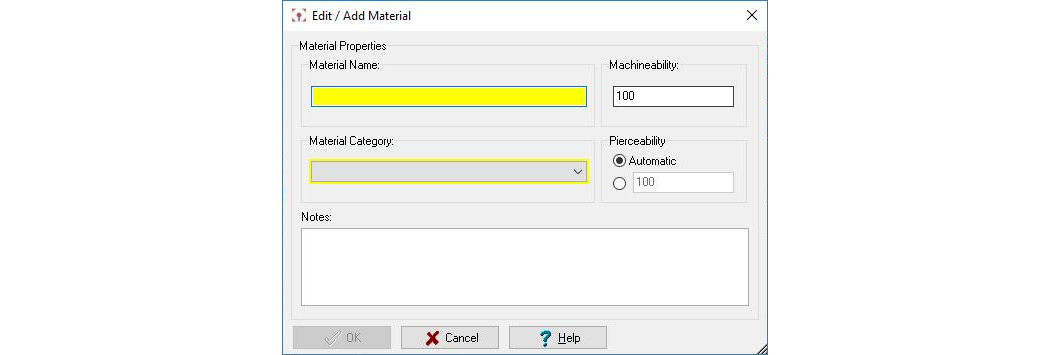
The Menu for Adding New Materials to Your Material Setup Options
Material Name:
Type in the name of this material as it will appear on the Material list.
The name given to your material is also used as the name of a file that supports this material. It is important that your material name not contain any characters or symbols that would not be allowed for use in a Windows' file name.
Machineability:
Enter the machineability value required to cut this material.
Material Category:
Click the down arrow to display the list of available categories. Click the one that fits the material being added.

Pierceability:
Pierceability is a material parameter used in the cutting model to predict stationary (not dynamic) piercing time. A larger value means a shorter stationary piercing time. Select Automatic to use the displayed Machineability value for piercing. Select the other option to enter a custom machineability value for piercing.
Enter any information of importance to you about this added material.
View/Edit This Material...
Click this option to view and edit your material's settings. This uses the same menu provided previously in Add New Material. You cannot edit any materials that were provided as part of the ProtoMAX software. To view and edit a material you entered, select it from the Material list and then click View/Edit This Material on the Machineability pop-up menu.
Delete This Material...
Click this option to remove any materials you've added to the Material list. You cannot delete materials that were provided as part of the ProtoMAX software. To delete a material that you added, select it from the Material list and then click Delete This Material on the Machineability pop-up menu.
Explore Materials Folder
Choose this option to share custom materials with other ProtoMAX users or machines. Each material is stored in its own file that is easy to copy and share. To copy custom materials to another computer, simply copy the material files into the appropriate folder.
Help on Materials...
Click this option to display the Material Setup page (this page) from the ProtoMAX help files.
Thickness
Specifies the thickness of the material being cut.
Tool Offset
Enter the tool offset value necessary to maintain the precision required for the part being machined. The tool offset is the distance in inches that the abrasive jet nozzle cuts away from the actual tool path. This offset value is typically one-half the kerf. For more information, refer to Measuring Kerf.
Entering the correct tool offset value is extremely important when cutting precise parts. Make it a regular practice to measure the tool offset and any resulting part error for nearly every part that comes off the machine and then make adjustments accordingly. You should do this even for parts not requiring precision just to develop correct habits for those jobs when precision is very important.
Scale
Entering a number for "Scale" adjusts the size of the drawing. Fractional values less than one reduce the size of the drawing. (Note that the amount of the tool offset determines the minimum size of the part.) If the drawing must be scaled by a large amount, it is more efficient to modify the original drawing in LAYOUT.
Do not use Scale to correct for an out-of-tolerance part. (That is, if a part comes out too small, don't use Scale to make the entire part larger.) If your part is out of tolerance, you want to adjust the tool offset.
