Cutting Brittle Material on a ProtoMAX
When cutting artistic parts out of glass and other brittle materials, some issues can occur such as cracking, frosting, or shattering of the entire piece. For most OMAX machines, a solution would be to change the timing of the abrasive when using brittle materials. However, the ProtoMAX works differently. Below are some ways to resolve issues with cutting brittle material.
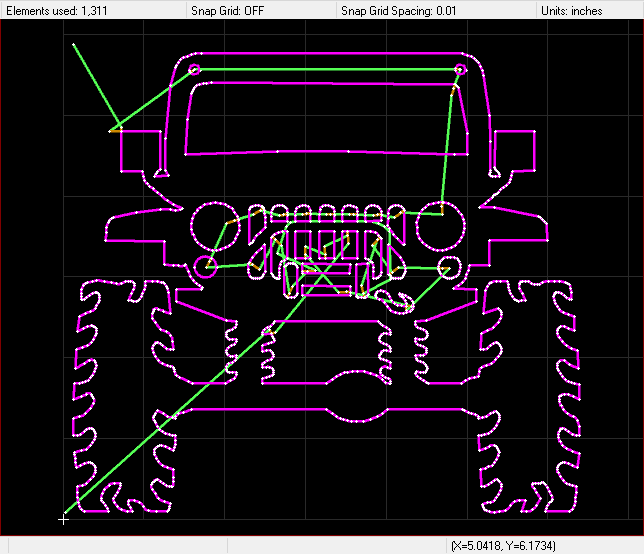
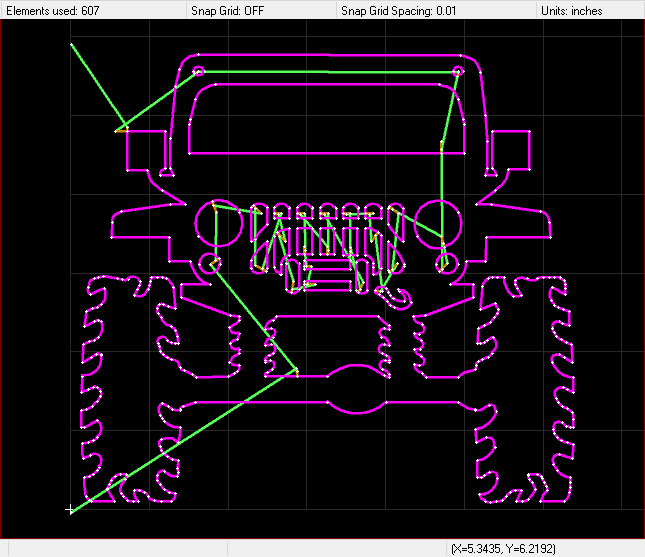
Original LAYOUT drawing
Move leads to different locations
Move leads as far away as possible from other features. We also recommend that you make the leads longer, so that if something does crack it is less likely for that crack to make its way all the way to the part.
The winch of the automobile has leads too close to the material, running a risk of microfracturing. If the jet stream gets to the spot where a microfracture has formed, it will shatter the part. The lead in the image above is about .030 in. (.76 mm) away from the cutting entity. It needs to be moved to a safer distance, which would be a minimum of .125 in. (3.1 mm). The winch doesn't have that much space in the first place. A good solution would be to redraw the design.
Ensure the material is wide enough
OMAX recommends that you avoid cutting thin webbing in brittle materials. In the original drawing (above), the material width between the grill and winch is between .060 in. (1.5 mm) and .070 in. (1.7 mm). This will cause the brittle material to attempt "flex" when the jet stream is piercing or cutting nearby, causing weak pieces to fragment. You will need more material between cutting entities. There should be at least .125 in. (3.1 mm) of material between holes.
Change the path
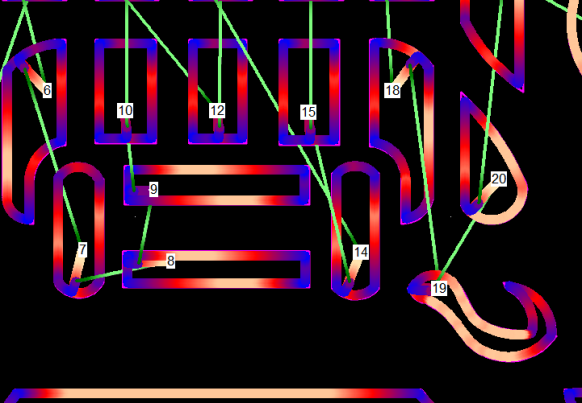
AutoPath was developed to be efficient; it saves time pathing and traversing. However, it runs the risk of breaking brittle material.
In the image below, the brittle material is likely to have issues at 9 and 10. There is no material to support the pierce and possibly the cutting.
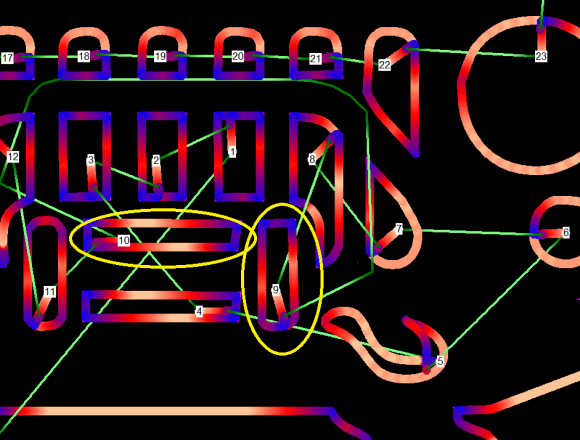
To help prevent shattering, change the pathing sequence and add more space between cuts.
Cutting entities too close
In the middle section near the springs on the right, there is a very small space that measures approximately .037 in. (.93 mm). The jet stream could collide with the material or cut through a hole.
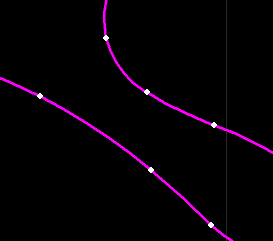
A small space
When the cutting head moves past the section a second time, much more pressure is applied to the material, possibly causing chipping and cracking. The jet stream can collide with the material or cut through a hole. A good practice is to expand the space. In this example, it was expanded to .125 in. (3.1 mm).

Expand the space to prevent damage to the material
Avoid many pierce points
Each time the machine pierces, there is a risk of creating a crack that can ruin the part. Although it is possible to make complex parts with many pierce points, each pierce point adds to the risk of cracking. Consider changing your design to minimize the amount of pierces.
The quickest fixturing solution
For cutting brittle material successfully, OMAX recommends installing the ProtoMAX Polymer Cutting Bed Kit, which you can find in the OMAX Marketplace. This reduces the risk of shattering your material. This material is firm yet soft; the holes in it are .25 in. (6.3 mm) in diameter, which is your maximum distance of support.
If problems persist after using the kit, adhere a piece of masking tape under the material in the problem area. This will reduce fragments and chipping.
Prime the abrasive line
Before your first cut is made with brittle material, always prime your abrasive line.
To prime the abrasive line:
1. Move the nozzle off the material.
2. In MAKE, click Test.
3. In the Test Operations dialog, click Test Cutting Head (Pump, Jet, and Abrasive).
When the pierce starts, pressure slowly builds as the pump ramps up. The abrasive line begins to slowly pull abrasive. This allows the pierce to "softly" cut the first hole.
After a few seconds, the pressure maximizes and the nozzle begins to move.
Redrawn using the above tips