Replace the Polymer Cutting bed
In time, the polymer cutting bed can become scored with deep garnet abrasive waterjet cuts and will be unable to provide the stability and support required for precision cutting.
The working life of a polymer cutting bed can be greatly improved by cutting at different table locations.
Bacteria in the tank water can build up. A minor break in the skin can introduce harmful bacteria into a wound. Always wear protective gloves if you have cuts or open wounds on your hands. Wear gloves that provide protection against sharp metal edges.
| 1. | Open the lid and lock it in the upright position. |
Use care when opening or closing the lid to avoid injury. Never let the lid free-fall. Keep hand, fingers, and body parts away from the side of the table when closing the lid.
| 2. | Remove the garnet bins. |
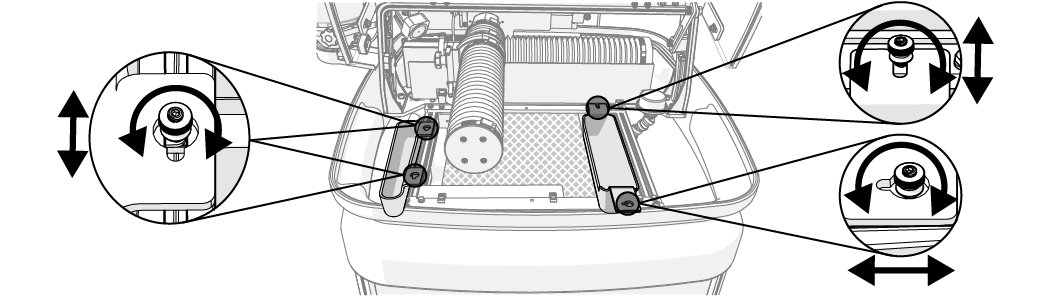
Figure 10
| 3. | Loosen the cutting bed bolts [1] and align the t-nuts [2] with the frame slot [3]. |
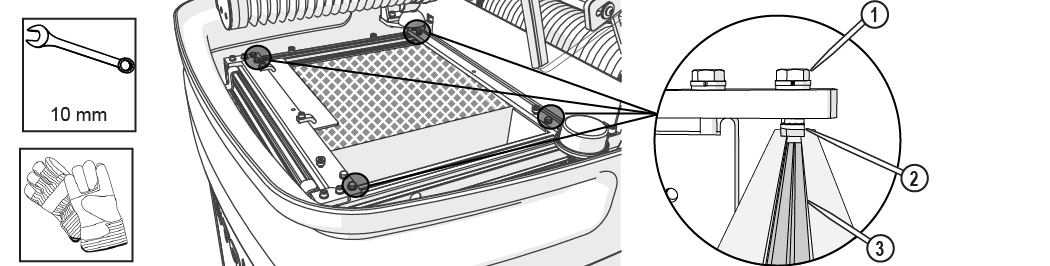
Figure 11
| 4. | Move the Y-axis to allow enough space to remove the cutting bed. |
Use care when removing the cutting bed to avoid damage to the Y- and Z-axes and the nozzle assembly.
| 5. | Carefully lift the cutting bed out of the catcher tank. |

Figure 12
| 6. | Loosen the fixturing plate screws [2] and remove the fixturing square [1]. |
Place a mark on the mounting plate of the fixturing plate location.

Figure 13
| 7. | Remove the screws [1] and the mounting plates [2]. |
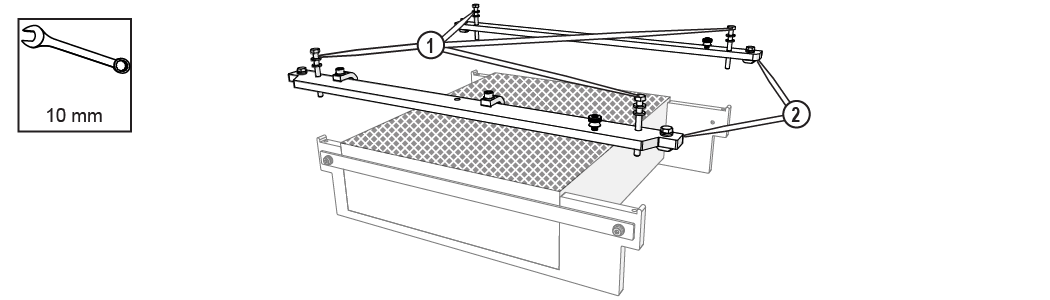
Figure 14
| 8. | Reinstall the screws [1] in the slat combs and hand-tighten. |

| 9. | Remove the polymer cutting bed [2] from the slat combs (Figure 15). |
| 10. | Clean the slat combs with a strong stream of water. |

| 11. | Place a new polymer cutting bed in the slat combs. |
| 12. | Remove the screws [1] from the slat combs and reinstall the mounting plates [2]. |
Figure 16
Ensure the mounting plate with the square clamps is located at the front of the cutting bed.
| 13. | Clean the frame t-slot [1] by spraying with a strong stream of water if needed. |

Figure 17
| 14. | Reinstall the polymer cutting bed. |
Use care when installing the cutting bed to avoid damage to the Y- and Z-axes and the nozzle assembly.
| a. | Rotate the t-nuts to align with the frame slot and tighten the t-nut bolt. |
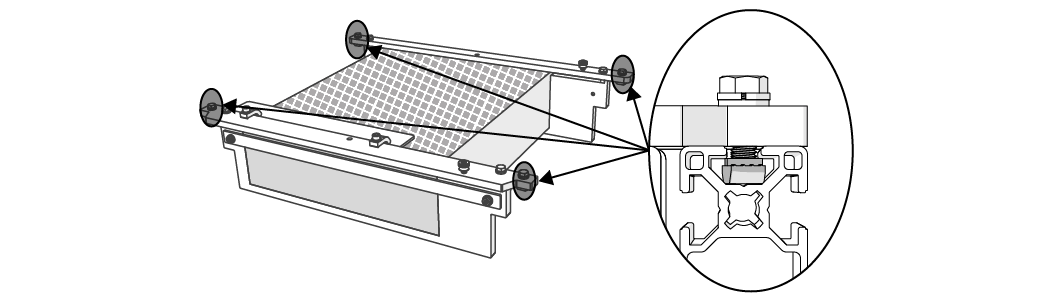
Figure 18
| b. | Place the polymer cutting bed on the frame with t-nuts [1] in the frame slot [2]. |
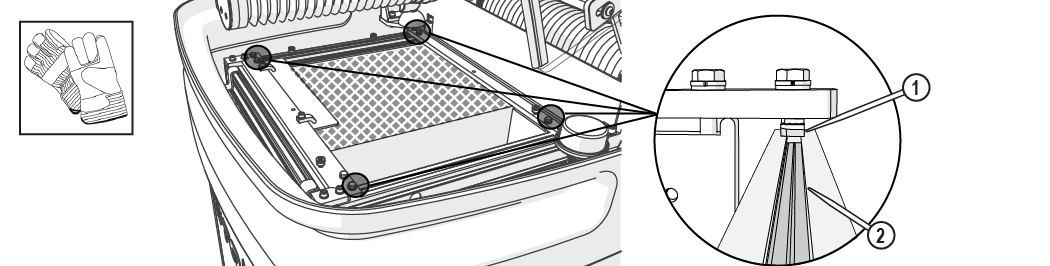
Figure 19
| c. | Slide the polymer cutting bed forward so it is flush against the front frame [1] and aligned between the bracket mounting plates [2]. |

Figure 20
| d. | Loosen the t-nuts completely, then tighten to lock in place. |

Figure 21
| 15. | Align the fixturing plate [1] to the marks and tighten the screws [2] or recut the fixturing square, see the fixturing-square instructions and video. |
 Cut the Fixturing Square
Figure 22
| 16. | Reinstall the garnet bins. |
| 17. | Close the lid. |
Use care when opening or closing the lid to avoid injury. Never let the lid free-fall. Keep hand, fingers, and body parts away from the side of the table when closing the lid.