Install the Polymer Cutting Bed Assembly

Use care when installing the cutting bed to avoid damage to the Y- and Z-axes and the nozzle assembly.
| 1. | Rotate the t-nuts to align with the frame slot. |
| 2. | Place the polymer cutting bed assembly on the frame with t-nuts in the frame slot. |
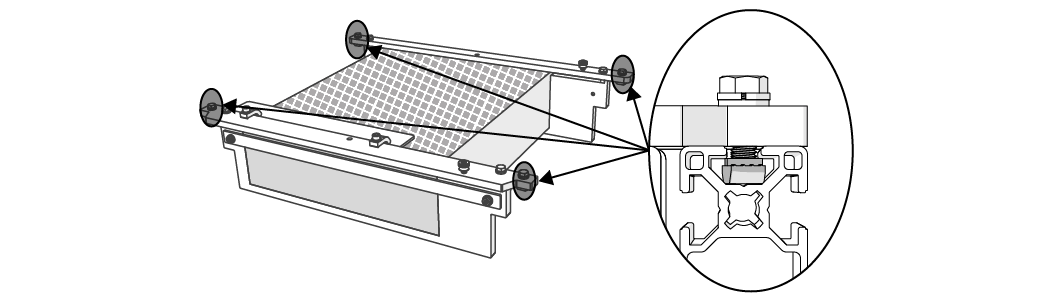
Figure 6
| 3. | Slide the polymer cutting bed forward so it is flush against the front frame [1] and aligned between the bracket mounting plates [2]. |

Figure 7
| 4. | Loosen the t-nuts completely, then tighten to lock in place. |

Figure 8
| 5. | Reinstall the garnet bins. |
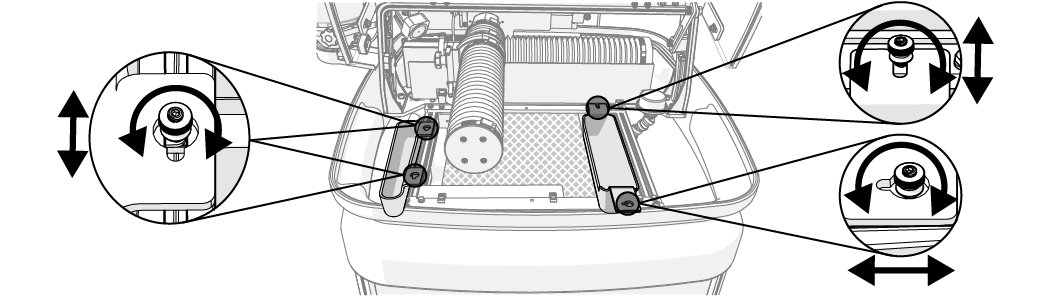
Figure 9
| 6. | Re-install the material holding clamps, see Install the Material Holding Kit. |
| 7. | Fill the catcher tank with water to just below the top of the polymer cutting bed; adjust the tank drain height as needed. |
| 8. | Close the lid. |
Use care when opening or closing the lid to avoid injury. Never let the lid free-fall. Keep hand, fingers, and body parts away from the side of the table when closing the lid.
| 9. | Cut the fixturing square; see the fixturing-square instructions and video. |