Rotate or Replace the Slats
Bacteria in the tank water can build up. A minor break in the skin can introduce harmful bacteria into a wound. Always wear protective gloves if you have cuts or open wounds on your hands. Wear gloves that protect against sharp metal edges.
In time, table slats can become scored with deep garnet abrasive waterjet cuts and become unable to provide stability and support required for precision cutting. See the Maintenance Schedule for the recommended frequency for this task.
The working life of a slat can be significantly improved by periodically rotating them to different table locations.
When replacing a defective slat, inspect the slat comb for excessive wear and replaced them as needed. Worn slat combs allow the slats to rock back and forth, which can interfere with cutting precision.
| 1. | Open the lid and lock it in the upright position. |
Use care when opening or closing the lid to avoid injury. Never let the lid free-fall. Keep hand, fingers, or body parts away from the side of the table when closing the lid.
| 2. | Remove the garnet bins. |
![]()
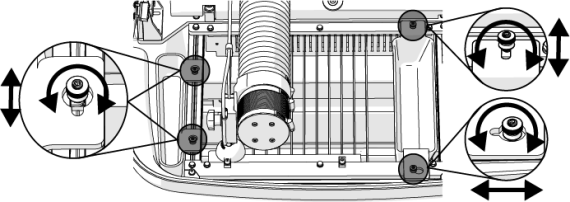
Figure 763
| 3. | Loosen the cutting deck bolts [1] and align the t-nuts [2] with the frame slot [3]. |


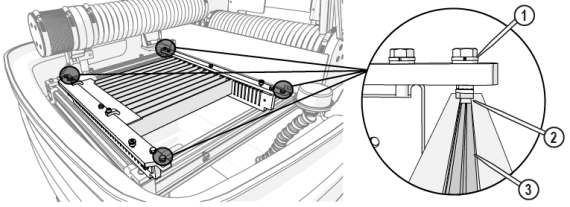
Figure 764
| 4. | Move the Y-axis to allow enough space to remove the cutting deck. |
Use care when removing the cutting deck to avoid damage to the Y- and Z-axes and the nozzle assembly.
| 5. | Carefully lift the cutting deck out of the catcher tank. |
![]()
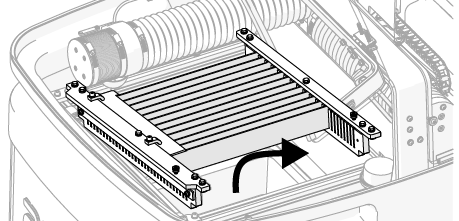
Figure 765
| 6. | Place a mark on the mounting plate of the fixturing plate location. |
If a mark is not placed on the mounting plate, a new fixturing plate needs to be cut after re-installation.
![]()
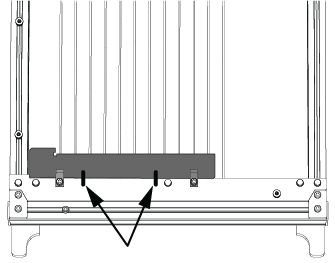
Figure 766
| 7. | Loosen the fixturing plate screws [1] and remove the fixturing square [2]. |

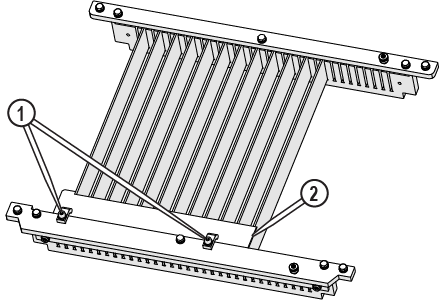
Figure 767
| 8. | Remove the screws [1] and the mounting plates [2]. |
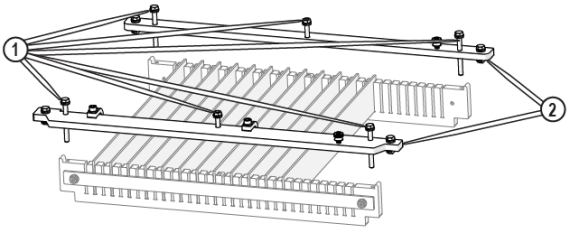
Figure 768
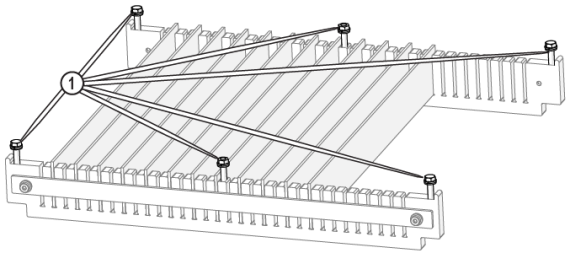
| 9. | Reinstall the screws [1] in the slat combs and hand-tighten to prevent dirt or debris from entering the screw threads. |
| 10. | Remove all badly worn slats. |
| 11. | Tap the slat combs and slats with a soft blow mallet to dislodge encrusted garnet, if needed. |

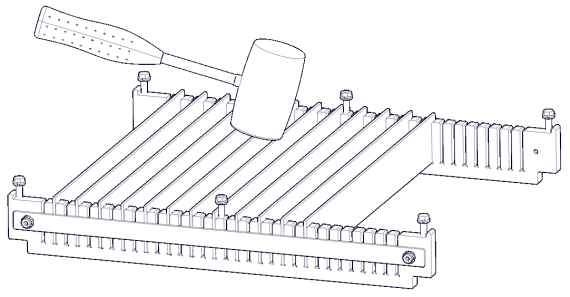
Figure 770
| 12. | Clean the slat combs and spray the slat assembly with a strong stream of water. |

| 13. | Rotate or replace slats as needed. |
Ensure the slat(s) [1] are seated flat against the slat comb slot [2]. Slightly raised slats can cause materials to wobble while cutting.
![]()
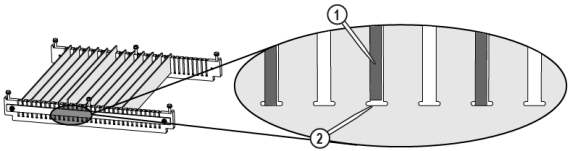
Figure 771
| 14. | Remove the screws and t-nuts from the mounting plate. |
| 15. | Apply a coat of anti-seize to the threads of the mounting plate screws and t-nuts. |

| 16. | Reinstall the mounting plates [2]. |
| 17. | Clean the frame t-slot [1], spray with a strong stream of water if needed. |
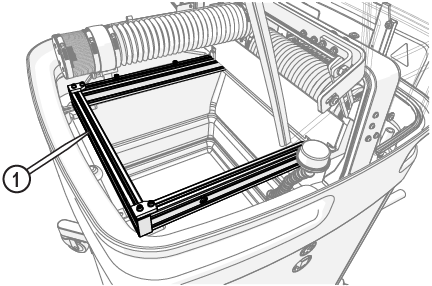
Figure 773
| 18. | Reinstall the cutting deck. |
Use care when installing the cutting deck to avoid damage to the Y- and Z-axes and the nozzle assembly.
| a. | Rotate the t-nuts to align with the frame slot and tighten the t-nut bolt. |
| b. | Place the cutting deck on the frame with t-nuts [1] in the frame slot [2]. |
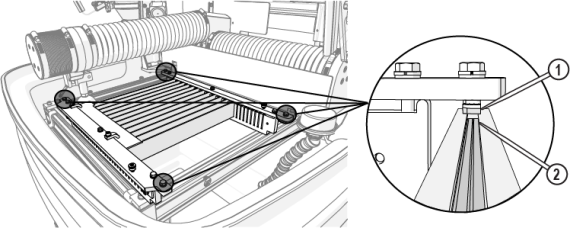
Figure 774
| c. | Make sure that the notches in the cutting deck align with the front mounting plate brackets. |
![]()

Figure 775
| d. | Loosen the t-nuts completely, then tighten to lock in place. |
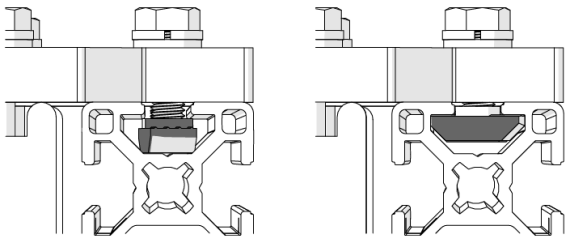
Figure 776
Figure 777
| 19. | Align the fixturing plate to the marks and tighten the screws [1] or recut the fixturing square [2]. See the Software Help files about fixturing squares. |
Figure 778
| 20. | Reinstall the garnet bins. |
![]()
Figure 779
Use care when opening or closing the lid to avoid injury. Never let the lid free-fall. Keep hand, fingers, or body parts away from the side of the table when closing the lid.
| 21. | Close the lid. |