
________________________________________
Position the Nozzle for Cutting
1. Once the material is loaded and clamped securely, physically move the nozzle to where you want the nozzle to begin cutting the part.

2. Open your test part in MAKE.

3. Place the nozzle start point above the material so the entire part can be cut out of the material, for best material utilization and to minimize your material scrap.
Note: This starting point will become your Path Start Home which automatically zeros itself once cutting begins. The nozzle will travel along this path, beginning from the start point (white cross) in your OMX file.
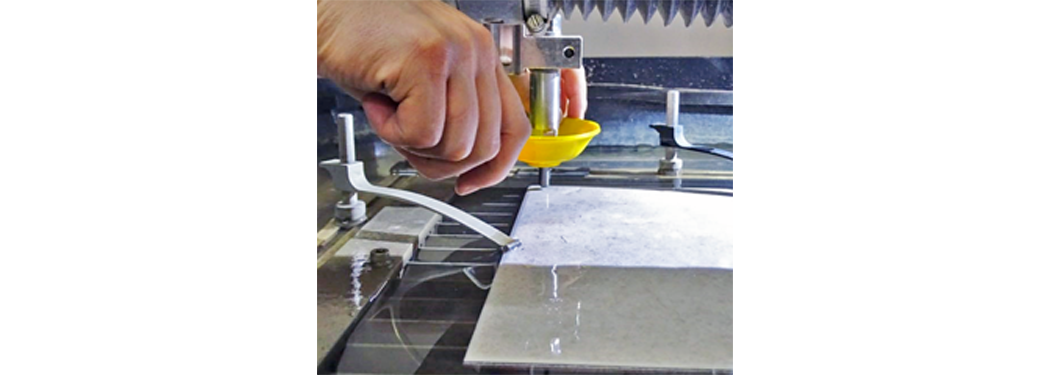
4. Loosen the nozzle height adjustment knob allowing the installation of the nozzle splash guard. Position the splash guard in its up position, allowing the nozzle tip to be viewed while setting the stand-off. Always use a splash guard!
Set the Nozzle Stand-off
The nozzle stand-off is the distance between the material surface and the tip of the nozzle mixing tube:
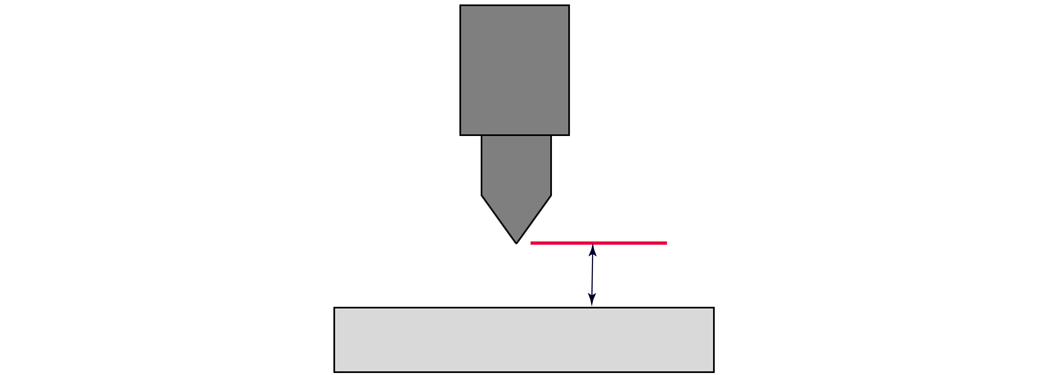
The nozzle stand-off for the ProtoMAX must be set to .075 in. using the provided feeler gauge.
1. Set the feeler gauge down on the material just below the nozzle tip.

2. Loosen the nozzle height adjustment knob allowing the nozzle to the lowered down to rest against the end of the .075 in. feeler gauge.

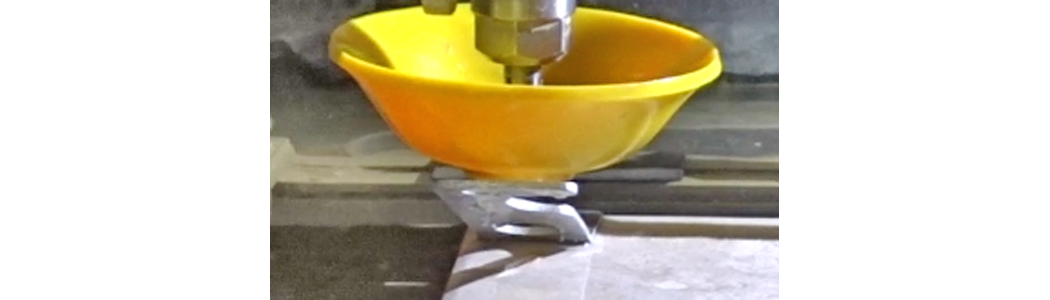
3. Tighten the nozzle height adjustment knob to lock the nozzle position in place at the .075 in. stand-off height.
4. Remove the feeler gauge. The stand-off height is now correctly set.