PREPARE THE ORIGINAL PUMP FOR RETURN
Two people are recommended to move the pump. Always move the pump slowly to avoid injury.
| 1. | Remove the crank case cover [1] screw, then set aside. |

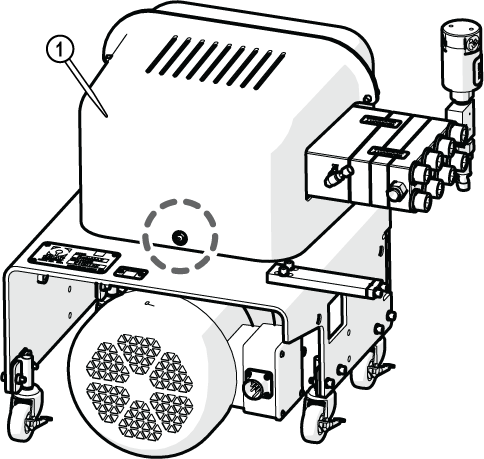
Figure 36
| 2. | Turn the pump around, loosen the front cover [1] captive screws, then remove the front cover and the crankcase cover. |
![]()
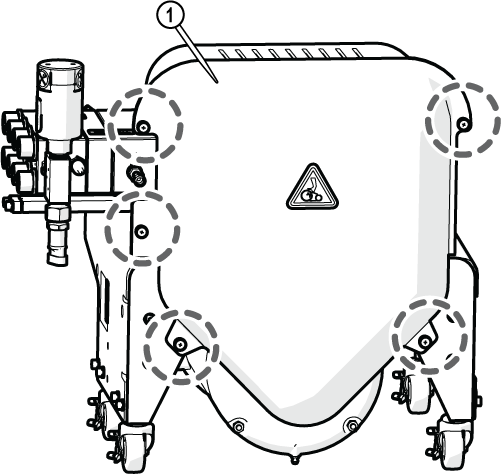
Figure 37
| 3. | Remove the dip stick [1] from the oil filler port [2]. |
![]()
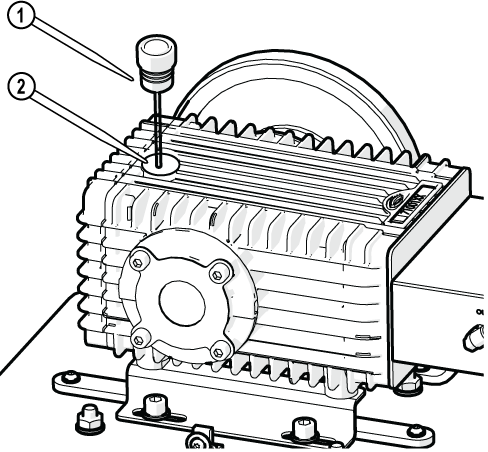
Figure 38
| 4. | Retrieve the red plug [1] from the new pump, then screw it to the oil filler port. |

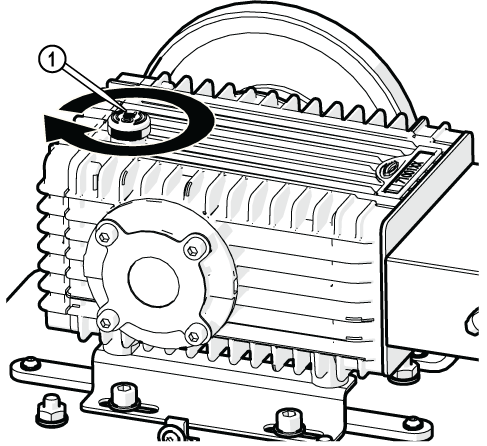
Figure 39
Oil may leak from the oil filler port during shipment if the dip stick is not replaced with the red plug. Shipping services may refuse shipment if oil is leaking from the pump.
| 5. | Replace the front cover and crankcase cover. |
| 6. | Mark the location of the lag bolt holes on the crate floor. |
To prevent the pump from moving during shipment, do not position the brackets in the same place as received. Load the original pump in the opposite direction as the new pump was loaded so the lag bolts are drilled on fresh wood. No predrilling is required.
Do not lift the pump by the safety valve or wet end. Roll or lift the pump by its frame when moving to avoid damage.
![]()
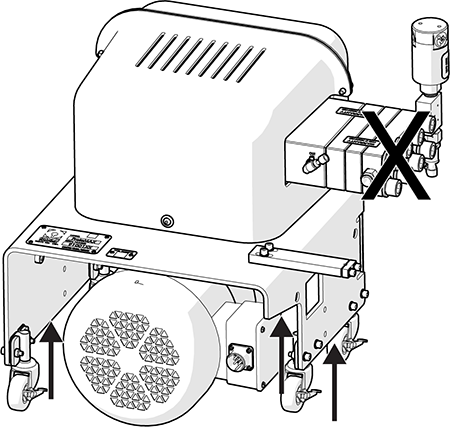
Figure 40
| 7. | Lock the pump wheels, then load the pump to the crate. |
| 8. | Loosely install the side bolts [1] and brackets [2] to the side of the pump. |


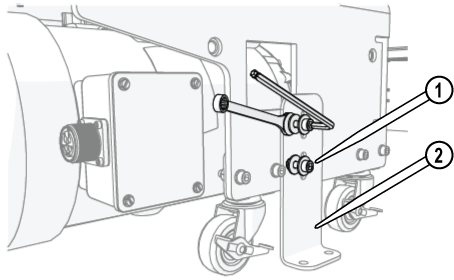
Figure 41
| 9. | Install the lag bolts to secure the pump to the crate. |


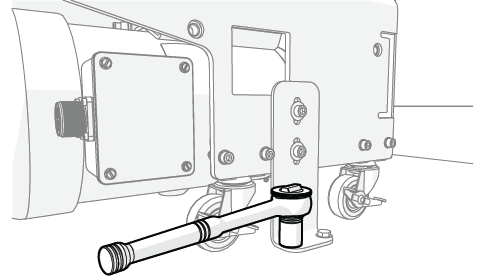
Figure 42
| 10. | Tighten the side bolts [1] and brackets [2]. |
Figure 43
| 11. | Replace the crate sides. |
| 12. | Place a copy of the emailed RMA packing slip inside the crate, then replace the crate top. |
| 13. | Enclose the crate with the shipping box, then secure the box using the provided packing straps and metal buckles. |
To secure the box to the crate, loop the straps through the metal buckles, then pull to tighten.
![]()
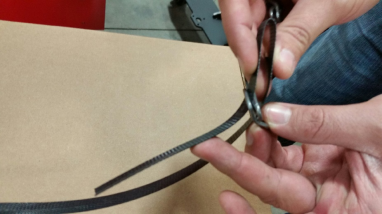
Figure 44
| 14. | Write the RMA number on the box. |