ProtoMAX®
Laptop Tray Guide
Hypertherm, Inc.
21409 72nd Avenue South
Kent, WA USA 98032
Information:
Technical Support:
E-Mail:
Web:
This document contains subject matter to which Hypertherm, Inc. has proprietary rights. Recipients of this document shall not duplicate, use, or disclose information contained herein, in whole or in part, for any use other than the purpose for which this manual was provided.
Hypertherm, Inc. believes the information described in this manual is accurate and reliable. From time to time, design improvements will be made to the OMAX equipment. Photographs, text, and sketches within the body of this manual may not exactly represent your equipment. In general, this manual contains the most up-to-date information available. However, Hypertherm, Inc. cannot accept any responsibility, financial or otherwise, for any consequences arising out of the use of this material. The information contained herein is subject to change, and revisions may be issued to advise of such changes or additions. OMAX strives to continually improve user documentation. If you have any questions or concerns about the content of this user’s guide, please e-mail us at tech_writing@omax.com, or contact us by mail at:
OMAX Technical Publications
21409 72nd Avenue South
Kent, WA, USA 98032
Hypertherm, Inc. is continually improving their equipment to bring you the best in abrasive waterjet machining technology. For that reason, your abrasive waterjet may differ slightly from what is described in this document. If you have any questions, please feel free to contact us at 1-800-298-4036 or e-mail us at info@protomax.com. You can also receive technical support on-line at: Web: www.omax.com/protomax-waterjet.
Original Instructions in English
June 2018
© 2018 Hypertherm, Inc.
Machine Safety Labels
These safety labels can appear on the equipment. If ignored, physical injury, death, or equipment damage may occur. Read the complete safety information in the operation, installation, or maintenance guide before the equipment is installed, operated, or maintained.

WARNING Electrical Shock
Dangerous voltages. Do not access areas with this label before the applicable safety precautions are done; lockout/tagout the power and make sure there is no voltage on the circuits before installation, maintenance, or other work is done.

WARNING Airborne Debris
Eye protection and hearing protection are required during operation. Do not remove the abrasive feed tube from the nozzle or hopper when pressurized. The pressure can blow abrasive into the air, and the abrasive particles can get into the eyes and contaminate tools and machines.

WARNING Keep Fingers and Hands Away From Parts that Move
Keep hands and fingers away from the machine when it moves and during operation. Fingers and hands can be crushed and cut by machine parts when they move. Do not try to gain access to the machine or parts during operation.

WARNING Pinch Risk
Keep hands away from the edge of the catcher tank when the lid is closed.

WARNING Keep Hands Away From Jet
Do not put hands or fingers near the nozzle during operation. Immediately get medical aid for abrasive waterjet injuries. Injuries caused by high-pressure abrasive waterjet systems are dangerous. Do not wait to get medical aid!

WARNING Watch Hands and Fingers
Always keep the motor guards in position during operation. Keep hands away from belts and pulleys during maintenance and service.

Electrostatic Discharge
Attention! Be careful when electrostatic-sensitive devices are touched. Use electrostatic discharge protection procedures.

No Open Flame
Do not smoke near the equipment. Do not operate the equipment in an explosive atmosphere. Make sure ignition sources (such as flames or electrostatic discharge) are not near the equipment. Do not store flammable materials near the equipment. Do not use equipment in or around flammable gases or liquids. Do not let explosive or flammable vapors collect in the area around the equipment. Make sure there is good airflow in the work area to dissipate gases, vapors, and fumes. Be especially careful when machining materials that create sparks, such as titanium, which can cause gases in the catcher tank to explode.

Do Not Operate With Guard Removed
Do not operate when the guards or panels are removed.

Do Not Spray
Do not spray water on or near the machine's electrical enclosure.

Do Not Step
Do not step, stand, or walk on the slats. The slats can become weak after operations and can fall under more weight.

Read Manual First/Do Not Adjust
Do not adjust. Read the manual. Special instructions could be required before adjustments are made. Adjustments to the equipment can have unwanted effects and cause injury or damage.

MANDATORY ACTION Disconnect Power
Always disconnect the primary power cord from the electrical source to isolate the machine from its electrical supply.

Read Manual
Read the equipment operation guide for important safety information and operation instructions. Do not operate this machine until all safety precautions and operation instructions are read and understood.

Wear Hearing Protection
Always wear hearing protection when near the equipment during operation. When operated above water, noise levels can exceed 70 dBA.

Wear Eye Protection
Always wear approved safety glasses when the abrasive waterjet system is operated. Other types of glasses do not give sufficient eye protection! The garnet abrasive is not a chemical irritant, but garnet can cause an eye injury like sand if it is not quickly flushed. Also, the catcher tank water can contain particles from the material or other chemical irritants. Have an eye-wash station near the work area if the abrasive spray gets into the eyes.
Read the product labels and refer to product Safety Data Sheets (SDS) to identify the properties and risks of chemical products and materials referenced in this document. Use good industrial hygiene, safety practices, and personal protective equipment identified in the SDS.

Wear Gloves
The catcher tank water can have dangerous bacteria in it. A small break in the skin can introduce the dangerous bacteria into a wound. Always wear protective gloves if there are cuts or wounds on the hands or fingers. When material is put on or removed from the slat bed, wear gloves that give protection against sharp metal edges.
Read the product labels and refer to product Safety Data Sheets (SDS) to identify the properties and risks of chemical products and materials referenced in this document. Use good industrial hygiene and safety practices. Use personal protective equipment as specified in the SDS.
Safety Legend
The following safety signal word panels and paragraph notifications may appear throughout this and other documentation. Each provides safety issue identification and recommended actions to avoid the hazard. Be alert! Follow the recommended safety actions and precautions to prevent injury or damage to the equipment.
Indicates a hazardous situation which, if not avoided, could result in death or serious injury.
Indicates a hazardous situation which, if not avoided, could result in minor or moderate injury.
Used to address practices not related to physical injury—property damage only.
Used to provide supplementary information, emphasize a point or give a tip for easier operation.
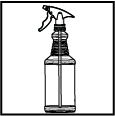
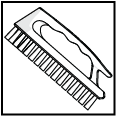
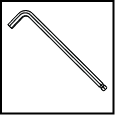
Required Tools
The following table contains a list of tools with the appropriate sizes that are needed to install the laptop tray onto the ProtoMAX. Tools listed with part numbers are included with the ProtoMAX or are available for purchase. Contact technical support for more information.
| Icon | Tool | Size(s) |
|---|---|---|
|
|
Spray bottle | |
|
|
Scrub brush | |
|
|
Allen wrench | 4 mm, 3 mm |
|
|
Shop rags | |
|
|
Safety glasses | |
|
|
Stand-off tool P/N 317876 |


Overview
The laptop tray provides a stable platform to place the ProtoMAX laptop. It is easily assembled and installed on the ProtoMAX. This guides provides the instructions for assembling the laptop tray and installing it onto the side of the ProtoMAX.
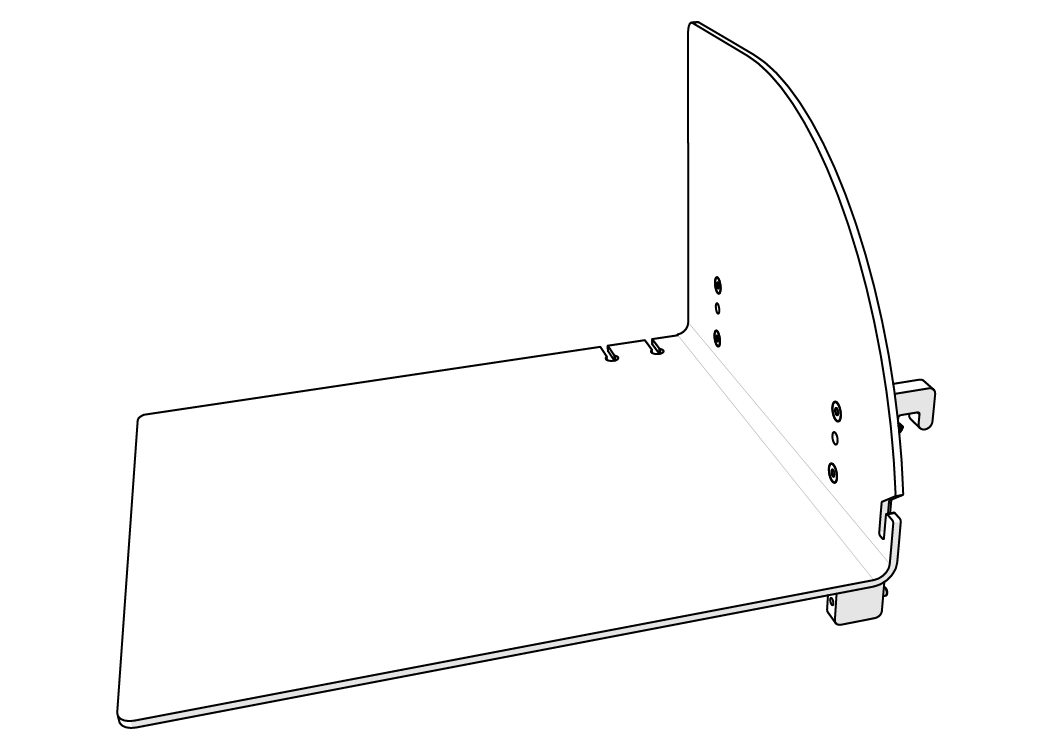
Components

Figure 1
| [1] Laptop tray | [3] Cone point setscrew (x 2) | [5] Front support bracket | [7] Beaded chain |
| [2] Flat-head screws (x 4) | [4] Flat point setscrew (x 2) | [6] Rear support bracket |
Assemble and Install the Laptop Tray
| 1. | Remove the flat-head screws [1] from the brackets and set aside. |

Figure 2
| 2. | Loosen the four set screws [1]. |
Ensure the cone point setscrews are installed on top and the flat point setscrews are at the bottom.

Figure 3
| 3. | Attach the brackets to the tray with the flat-head screws and tighten. |
Ensure the thick bracket [2] is attached on the curved edge (front) [1] of the tray.
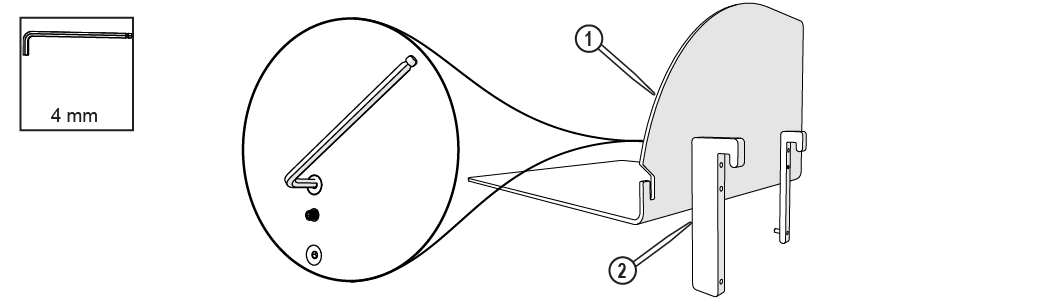
Figure 4
| 4. | Hang the laptop tray on the left side of the catcher tank. |
Ensure the rear of the laptop tray does not interfere with the hopper.
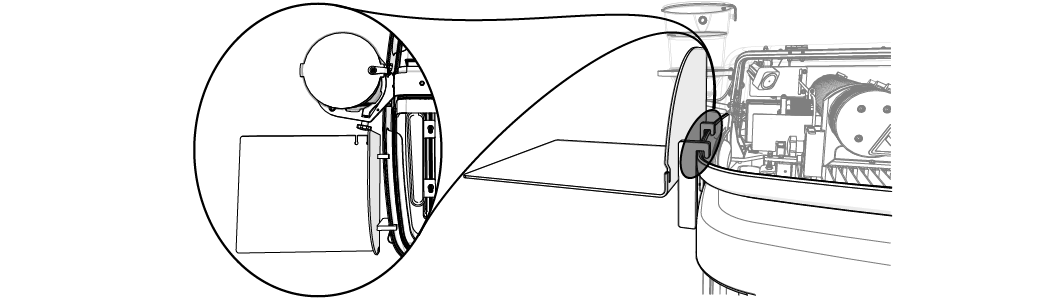
Figure 5
| 5. | Adjust the set screws to stabilize the laptop tray against the catcher tank. |
Tighten the top set screws until the pointed end of the screw sets firmly into the catcher tank. This helps the laptop tray from accident being knocked from the machine.
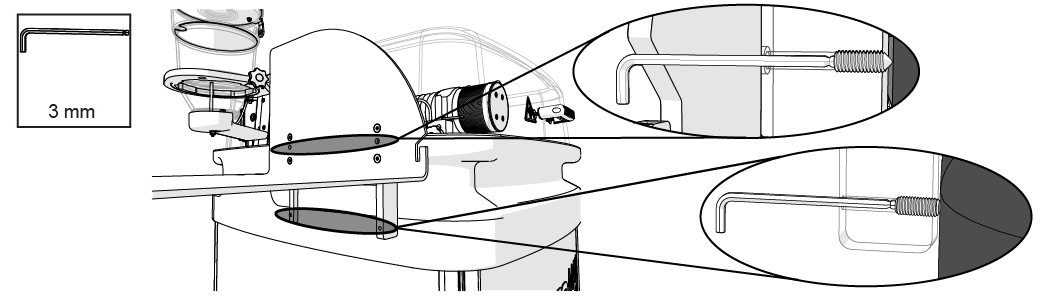
Figure 6
| 6. | Place the laptop on the tray and route the laptop power cable [1] and USB cable [2] through the slots at the rear of the laptop tray. |

Figure 7
| 7. | Attach the bead chain to the stand-off tool (included with the ProtoMAX) and hang it on the laptop tray front. |

Figure 8
Clean the Laptop Tray
The laptop tray does not require maintenance. Periodically cleaning the laptop tray of accumulated garnet is recommended and should be performed during normal cleaning activities.
To avoid damage, do not use flammable liquids or other chemicals to clean the equipment.
| 1. | Unplug the laptop power and USB cables from the laptop. |
Do not allow these cables to fall to the floor where they can be stepped on and covered with garnet and other contaminates.
| 2. | Place the power and USB cables in the slots provided in the laptop tray to hold them in place during tray cleaning. |
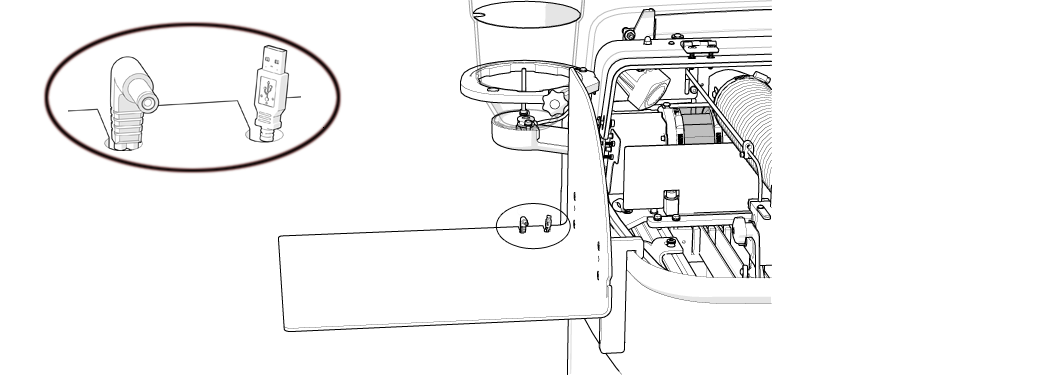
Figure 9
| 3. | Remove the laptop from the laptop tray and set it in a safe place during cleaning. |
| 4. | Wipe down the laptop tray to remove debris and garnet. |

| 5. | Place the laptop back in the laptop tray and reconnect the power and USB cables. |
Technical Support
Refer to the ProtoMAX website for technical support contact information.
Warranty
Contact Customer Support or go to the ProtoMAX website.