Remove a Flexible Tank Drain and Connection Clog
Water can damage the electrical control cabinet and other components. Always make sure the water in the catcher tank is removed, or the water is below the adjustable tank drain [1] and the tank overflow drain [2] before cleaning or removing the drain hoses and connections.
![]()
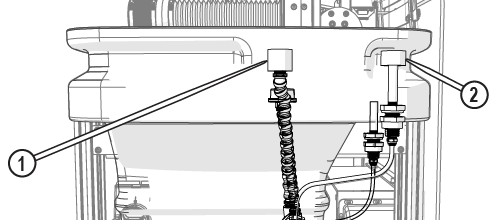
Figure 875
The tank drain pipe is attached to the drain filter and runs down to a drain elbow located in the bottom right, rear corner of the catcher tank. Silt and suspended particles from the cutting process can accumulate in this drain pipe and elbow over time, reducing the ability of the catcher tank water to drain from the tank. If the water flow from the catcher tank is compromised, clean the components of the drain.
![]()
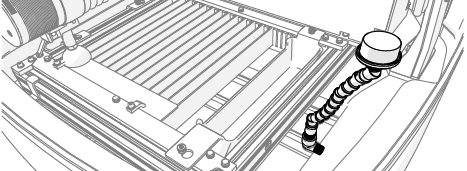
Figure 876
| 1. | Open the lid and lock it in the upright position. |
Use care when opening or closing the lid to avoid injury. Never let the lid free-fall. Keep hand, fingers, or body parts away from the side of the table when closing the lid.
| 2. | Remove the filter [1]. |
![]()
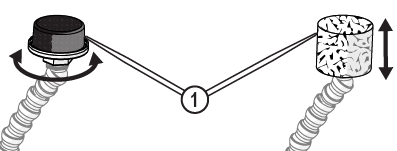
Figure 877
| 4. | Spray a strong stream of water through the drain pipe and elbow to rinse any debris or sludge from inside the components. |
| 5. | Scrub inside the flexible pipe and elbow to dislodge any remaining debris or sludge. |

| 6. | Clean the outside of the flexible pipe and rinse. |
| 7. | Replace the flexible pipe when joints are damaged or loose. |
Do not overtighten the flexible pipe connection. Over tightening can cause cracking and breaking of the flexible pipe or elbow connection and can cause leaks.
| 8. | Reattach the flexible pipe [1] to the elbow and tighten. |
![]()
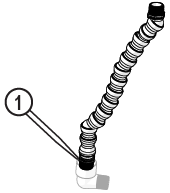
Figure 879
| 9. | Reinstall the drain filter [1]. |
![]()
Figure 880
| 10. | Close the lid. |