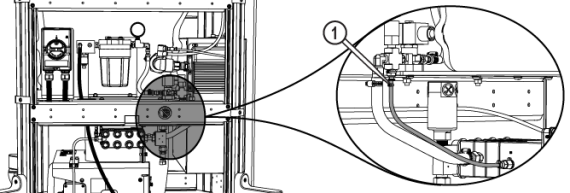
Prepare the Pump for Maintenance
| 3. | Turn OFF the machine. |

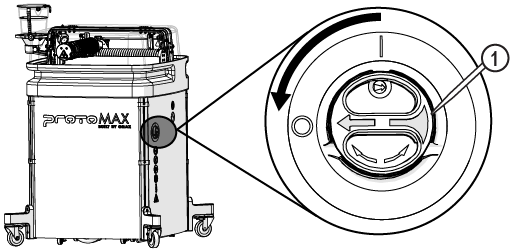
Figure 705
| 4. | Disconnect the power cord from the electrical outlet. |
| 5. | Turn OFF the water supply. |
| 6. | Ensure there is no pressurized water in the high-pressure lines. |
| a. | Open the lid and lock it in the upright position. |
Use care when opening or closing the lid to avoid injury. Never let the lid free-fall. Keep hand, fingers, or body parts away from the side of the table when closing the lid.
| b. | Loosen the gland nut [1] to release the pressure; water can leak from the inlet body weep hole. |


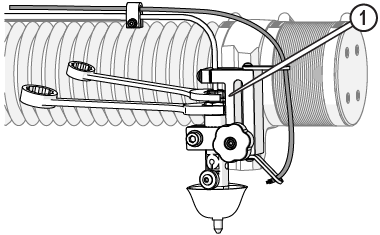
Figure 706
| c. | Tighten the gland nut [1]. |


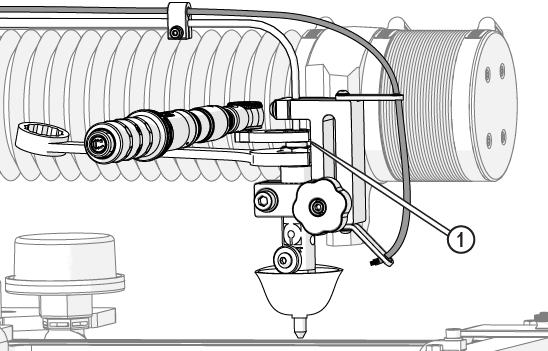
Figure 707
| 7. | Remove the side panels. |
| 8. | Remove the front frame support bracket [1]. |

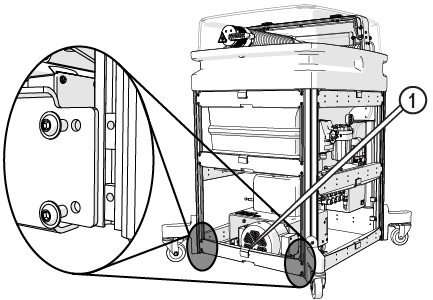
Figure 708
| 9. | Disconnect the pump power cable. |

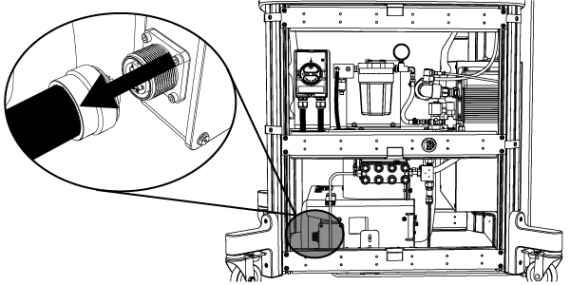
Figure 709
| 10. | Disconnect the high-pressure plumbing. |
Protect the connecting ends from external contamination or debris. Debris can enter into the high-pressure plumbing system and damage the pump or nozzle.


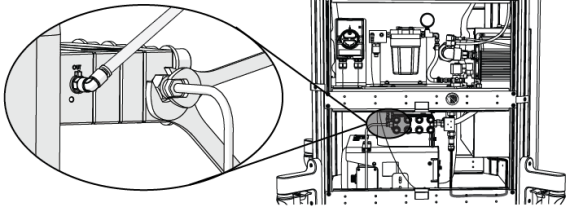
Figure 710
| 11. | Loosen the high-pressure support bracket [1] and remove the support cap [2]. |


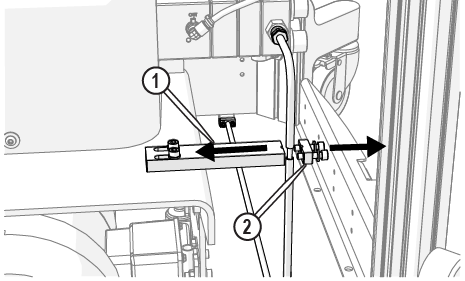
Figure 711
| 12. | Disconnect the cooling line OUT [1]. |
Protect the connecting ends from external contamination or debris. Debris can enter into the high-pressure plumbing system and damage the pump or nozzle.


Figure 712
| 13. | Disconnect the cooling line IN [1]. |
Protect the connecting ends from external contamination or debris. Debris can enter into the high-pressure plumbing system and damage the pump or nozzle.
| 14. | Disconnect the incoming water hose [1]. |
Protect the connecting ends from external contamination or debris. Debris can enter into the high-pressure plumbing system and damage the pump or nozzle.

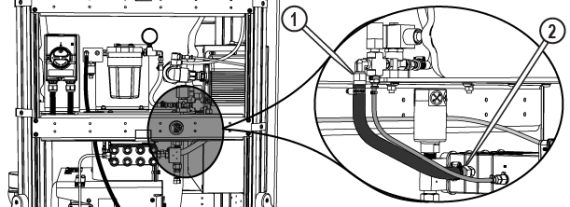
Figure 714
| 15. | Disconnect the transducer cable [1]. |
Protect the connecting ends from external contamination or debris. Debris can enter into the high-pressure plumbing system and damage the pump or nozzle.

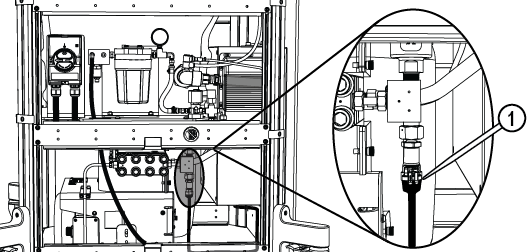
Figure 715
| 16. | Unlock the pump wheels and move the pump out from the machine. |
