Lubricate the X-Axis Lead Screw and Linear Rail Bearing Carriages
Use Arctic Grease only. Do not use other greases. Other greases can affect system operation.
![]()

Figure 843
| 1. | Remove the bellows protector splash shield [1]. |
| 2. | Move the Y-axis to the middle of the cutting deck. |
| 3. | Turn OFF the machine, close MAKE, and close the front lid. |
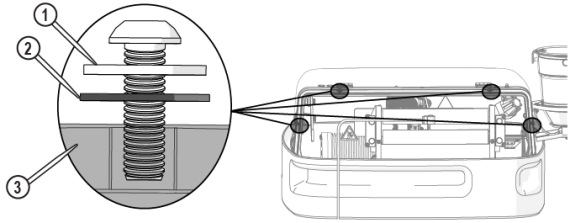
| 4. | Remove the screws and washers [1] securing the rear lid and set aside. |

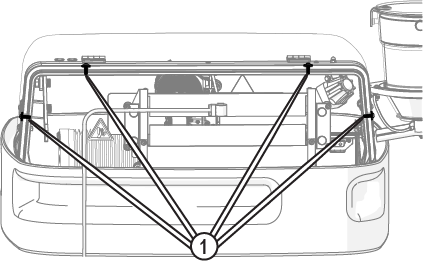
Figure 844
| 5. | Lift the lid, then slide it down the high-pressure plumbing to the floor. |
To prevent scratches to the lid, place it on a soft surface.
![]()
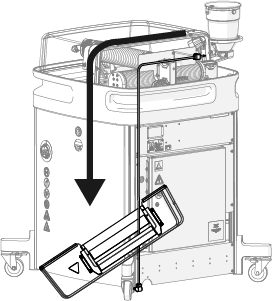
Figure 845
| 6. | Rinse and wipe away all debris from the bellows [1]. |


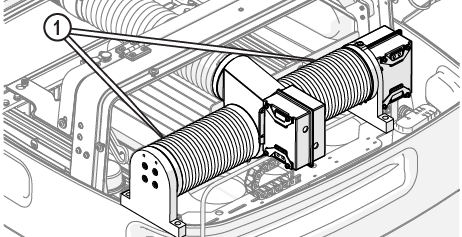
Figure 846
| 7. | Place a piece of cardboard on the cutting deck to keep components or tools from falling in the catcher tank. |
Do not move the bellows away from the X-axis carriage. The area around the X-carriage must be clean of debris to prevent erosion damage to the internal components.
| 8. | Loosen the center clamps [1]. |

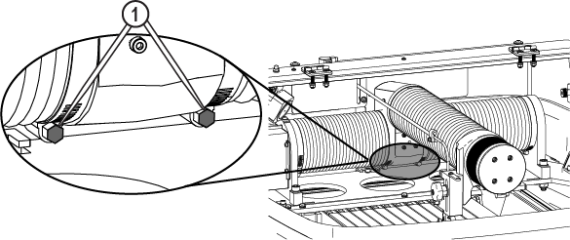
Figure 847
Figure 848
| 9. | Push up on the bottom of the clamps to loosen, then slide the clamps toward the ends. |
| 10. | Wipe the bellows ends [1] and X-axis carriage with a clean rag; remove all debris. |
| 11. | Move the bellows to the ends of the axis and clean all debris from around the lead screw nut [1] with a dry, soft cloth. |
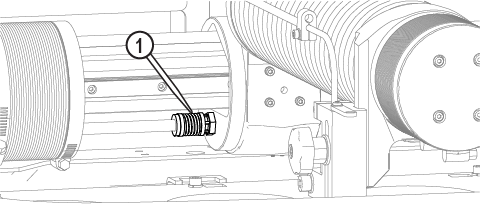
Figure 849
| 12. | Apply a light coat of lubricant, approximately 1/8 in. bead, along the length of the lead screw [1], then spread the lubricant along the lead screw surface. |


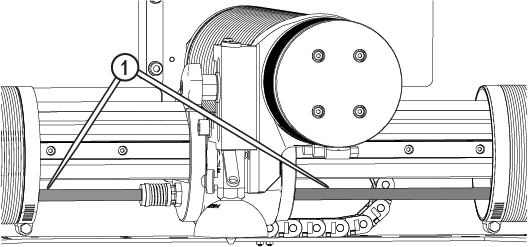
Figure 850
Figure 851
| 13. | Turn ON the machine, open MAKE, then move the X-axis to one side. |
| 14. | Identify if the linear rail bearing carriage has a set screw [1] or grease fitting [2], then complete the appropriate step. |
![]()
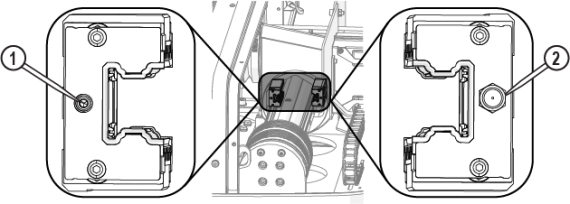
Figure 852
| 15. | Lubricate linear rail bearing carriages with a grease fitting: |
| a. | Attach the grease gun nipple to the grease fitting. |
| b. | Pump the grease into the linear rail bearing carriage until it comes out the edges [1]. |

| 16. | Lubricate linear rail bearing carriages without a grease fitting: |
| a. | Remove the set screw. |

| b. | Insert the grease gun needle into the set screw port. |

| c. | Pump the grease into the linear rail bearing carriage until it comes out the edges [1] (Figure 853). |
To avoid damaging the linear rail bearing carriage, do not over tighten the set screw.
| d. | Replace the set screw and tighten it. |
| 17. | Reattach the bellows to the X-axis carriage, pulling the bellows lip [1] over the carriage edge [2]. |
Rotating the bellows helps to eliminate rub marks or holes on the interior of the bellows, prolongs the bellows life. If needed, loosen the clamp at both ends of the bellows, rotate the bellows approximately 90 degrees then secure with the clamps.
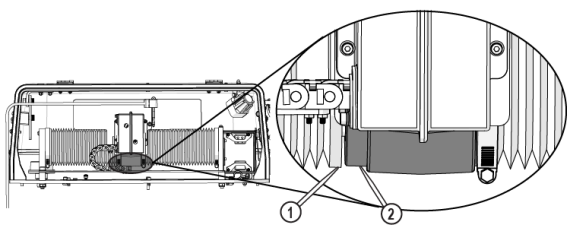
Make sure there is an even gap [1] between the X-axis carriage housing and the bellows lip to keep debris from entering into the bellows and causing damage to the interior components.
![]()
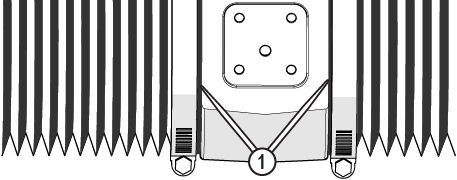
Figure 855
| 18. | Secure with the clamp. |
| 19. | Replace the bellows protector splash shield [1]. |
![]()
Figure 856
If needed, clean the cable track area before replacing the rear lid. See Clean the Cable Track.
| 20. | Replace the rear lid and secure with the screws and washers (x 4) (Figure 857). |
To prevent damage to the lid [3], place the rubber washer [2] between the lid and the metal washer [1]. Do not over tighten the screw.


| 21. | Move the X-axis side to side three full strokes to distribute the lubricant along the lead screw. |
![]()
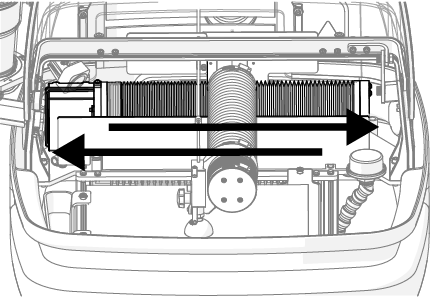
Figure 858
Use care when opening or closing the lid to avoid injury. Never let the lid free-fall. Keep hand, fingers, or body parts away from the side of the table when closing the lid.
| 22. | Close the lid. |