Flush the High-Pressure Plumbing
Flushing the system ensures there is no debris in the high-pressure plumbing that can clog the nozzle during operation.
Plugs or caps on the ProtoMAX system indicates required connections. To avoid injury and/or damage, verify all water and high-pressure connections are made before continuing. Contact OMAX Technical Support if needed.
| 1. | Open and secure the lid. |
Use care when opening or closing the lid to avoid injury. Never let the lid free-fall. Keep hand, fingers, or body parts away from the side of the table when closing the lid.

Figure 227
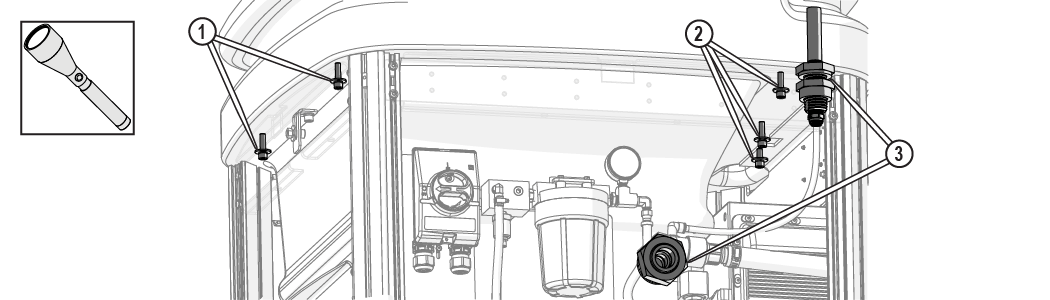
| 2. | Unscrew the protective cap from the inlet body and verify the nozzle filter [1] is not installed; remove the nozzle filter if installed and discard. |

Figure 228
| 3. | Loosen the Z-axis [1] and lower it to the lowest position. |
Hold the inlet body when loosening the hand knob. Do not let the inlet body fall and strike the cutting deck slats. Damage to the inlet body may occur, which may cause leaks.

Verify the abrasive feed tube is not connected to the nozzle.

Figure 230
| 4. | Close the lid. |
Use care when opening or closing the lid to avoid injury. Never let the lid free-fall. Keep hand, fingers, or body parts away from the side of the table when closing the lid.
| 5. | Connect the other end of the incoming water line to the water source (connection to the water source is customer supplied). |
Do not pinch or trap any wires in the opening. Pinching or trapping may damage the wrapped cable, causing communication errors or inaccurate water temperature readings.
| 6. | Open the main water source. |
| 7. | Push the button [1] on the water filter to release the air. |
Place a rag over the top of the water filter to prevent water from spraying.
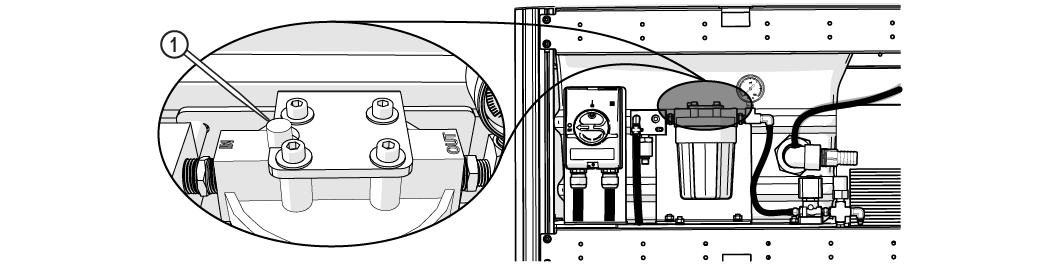
Figure 231
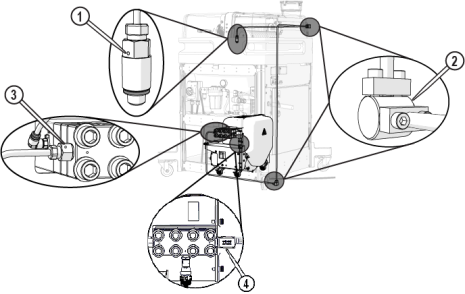
| 8. | Check for leaks at the incoming water [1] , filter out [2], solenoid [3], solenoid to pump [4], cooling line to pump [5], cooling line IN [6], and pump incoming water [7] connections. |
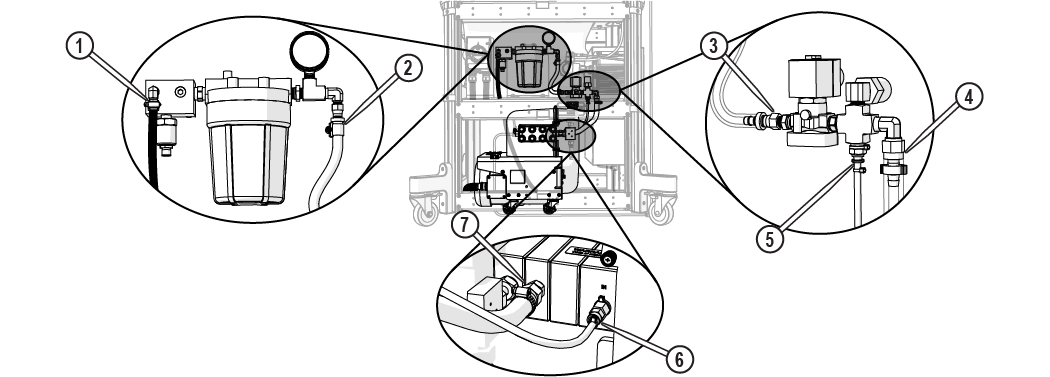
Figure 232
| 9. | In MAKE, use the X, Y Jog buttons [1] or the keyboard arrow keys to position the nozzle between two slats in the center of the cutting deck. |

Figure 233
| 10. | Click Test [1]. |
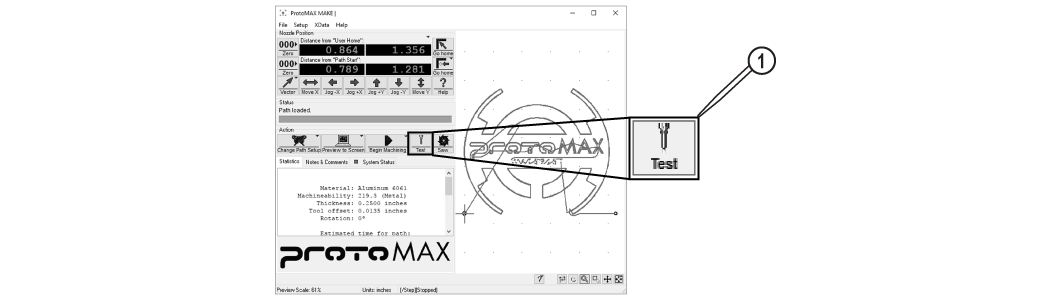
Figure 234
| 11. | In the Test Operations dialog box, select Flush plumbing, click . |

Figure 235
Verify the abrasive feed tube is not connected to the nozzle.
Figure 236
| 12. | Click . |
The flush test will run for 30 minutes. The pump will cycle on and off during the test operation, but water will still flow. The test automatically stops after 30 minutes.
Keep a minimum of 16 in. (40 cm) away from pressurized equipment during operation. Do not try to tighten ultra-high-pressure (UHP) fittings while the system is under pressure. Do not touch or rub suspected high-pressure plumbing leaks. Rubbing or touching suspected high-pressure leaks may result in injury. If a leak is found, shutdown the system, then fix the leak before continuing. Never attempt to fix a leak while the ProtoMAX is running.
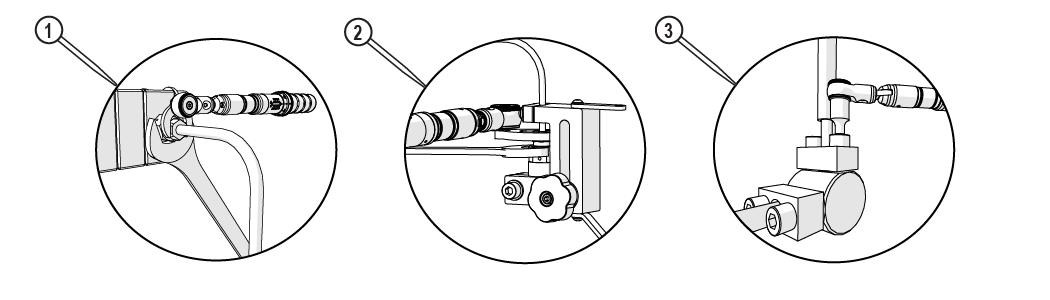
| 13. | Check the high-pressure plumbing for leaks at the nozzle [1], high-pressure fittings [2], pump connection [3] and safety release valve [4] during the test operation. |
- If a leak is found, shut down the system and torque the connection using the information in the following table.
The jaws of the crowfoot must maintain a 90-degree angle to the horizontal axis of the torque-wrench handle throughout the torquing rotation. Other angles of orientation will alter the set torque.
Figure 238
| Tools and Torque Specification | Location |
|---|---|
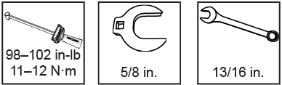
|
Pump [1] |
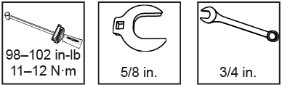
|
Nozzle [2] |
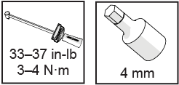
|
High-pressure fitting [3] |
| 14. | Click when the flush is complete. |
| 15. | Fill the tank with water up to the top of the slats and check for leaks at the tank front [1], tank rear [2], and tank drains [3]. |