Place and Connect the Pump
DO NOT cut the black cable ties! Black cable ties secure components to the table and should remain in place. ONLY cut the orange cable ties. Orange cable ties are used to protect and secure components during shipment.
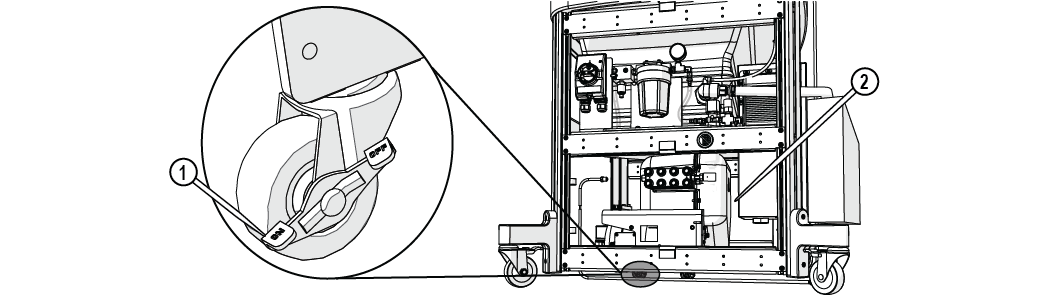
| 1. | Roll the pump under the table and lock one of the pump wheels [1]. |
Leave a 1–2 in. space [2] between the back of the pump and the control cabinet.
| 2. | Carefully remove the packing materials and connect the cooling line OUT to the push-to-connect OUT connection [1] on the pump. The cooling OUT line and connection have yellow cable ties attached. |
Connecting points are capped to prevent debris from entering into the lines. Remove the protective cap before making connections.
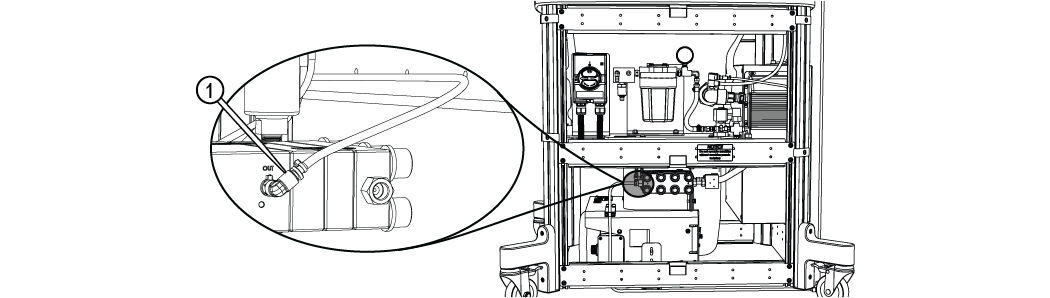
Figure 183
| 3. | Carefully remove the packing materials and connect the cooling line [1] from the IN connection on the pump to the push-to-connect fitting at the solenoid. The cooling IN lines and connections have red cable ties attached. |
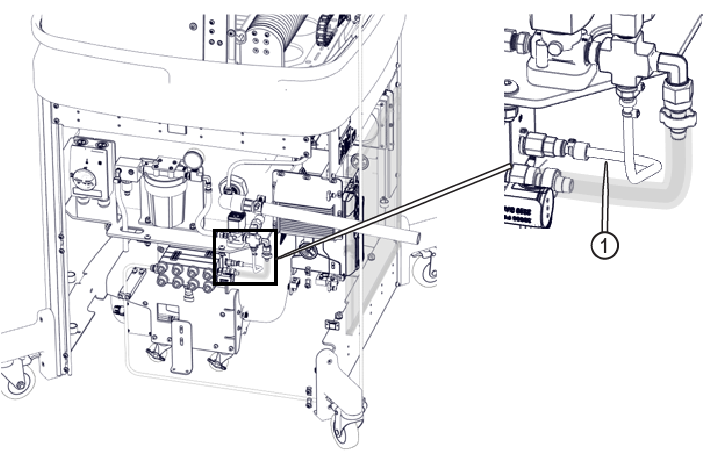
Figure 184
| 4. | Carefully remove the packing materials and connect the supply water hose from the pump wet-end [2] to the 90 degree fitting [1] and tighten. |
Do not use Teflon tape or pipe sealant on the water connections. Teflon thread or sealant particles may enter into the high-pressure plumbing system and damage the pump and/or nozzle.
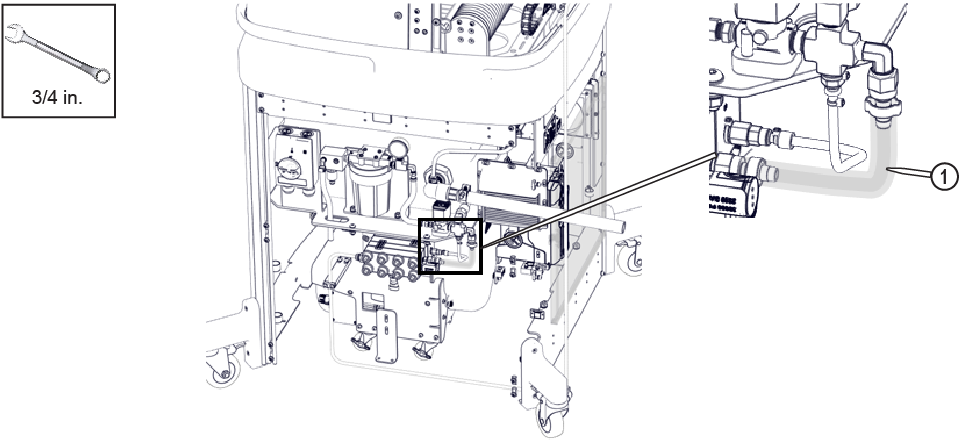
Figure 185
| 5. | Carefully remove the packing materials from the transducer cable [2] , apply a light coat of dielectric compound to the transducer cable, then connect the transducer cable to the transducer [1]. |
![]()
Figure 186
Pump Style One
![]()
Pump Style Two
| 6. | Carefully remove the packing materials, apply a light coat of dielectric compound to the pump power cord connector [1], then push the cord in and turn to connect to the pump power connector [2]. |
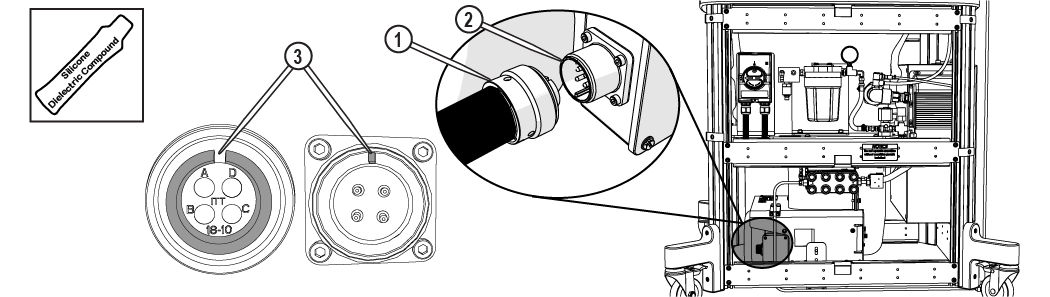
To prevent cross-threading the plug and connector, line up the notches [3] on the cable plug and power connector. Push the plug until it seats in the connector, then rotate the shell counter-clockwise until the threads engage, then turn the shell clockwise to tighten.