Install the Garnet Abrasive Hopper
The garnet abrasive assembly was originally stored under the tank and removed and set aside in a previous step. See Remove the Cutting Deck Shipping Materials.
| 1. | Locate the garnet abrasive hopper assembly and carefully remove the packing materials. |
| 2. | Adjust the cutting deck light to access the hopper mounting location [1]. |

Figure 211
| 3. | Cut the orange cable tie securing the grounding cable.  |
| 4. | Attach the hopper assembly [1] to the exterior of the roll bar with the supplied hardware [2]. |
Ensure the ground connection located inside the roll bar is attached to the inward hopper mounting bolt [2]. Order on bolt is washer, grounding cable, then lock washer.
DO NOT cut the black cable ties! Black cable ties secure components to the table and should remain in place. ONLY cut the orange cable ties. Orange cable ties are used to protect and secure components during shipment.
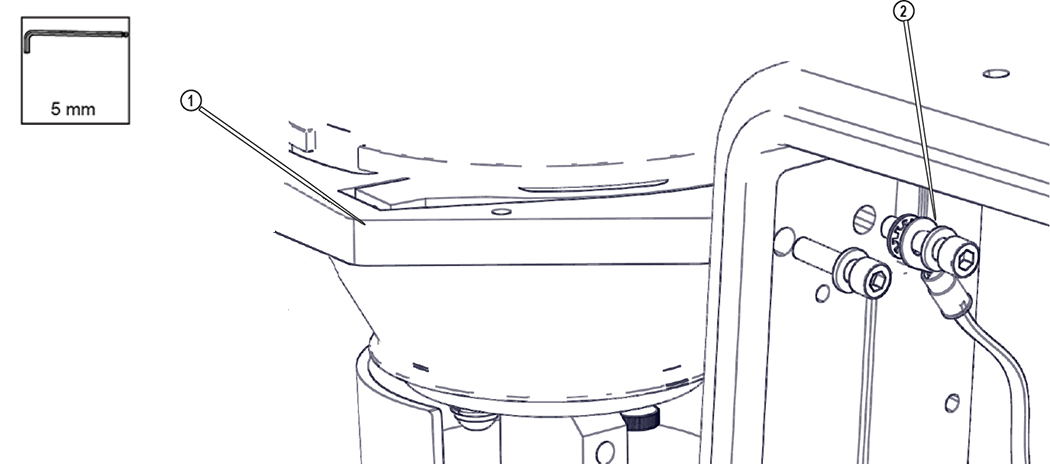
Figure 212
| 5. | Insert the hopper assembly in its mounting bracket [1]. |
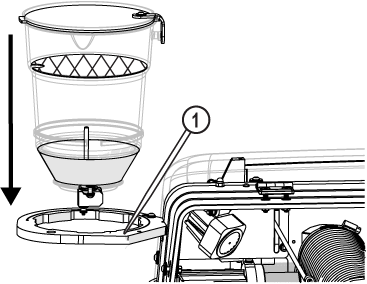
Figure 213
| 6. | Insert the abrasive feed tube through the roll bar [2], then insert the feed tube into the abrasive feed block [1]. |
Verify the abrasive feed tube is not kinked or twisted.
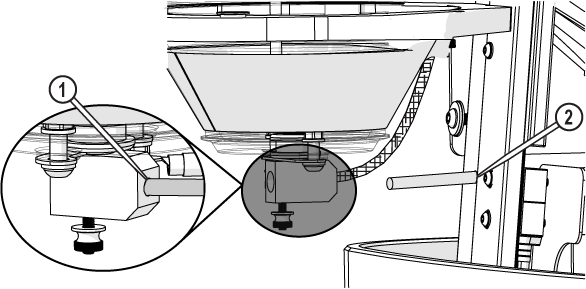
Figure 214
| 7. | Attach the hopper splash guard [1] to the hopper bottom, ensuring the washer is on the bottom of the hopper splash guard, then tighten the thumb screw [2]. |
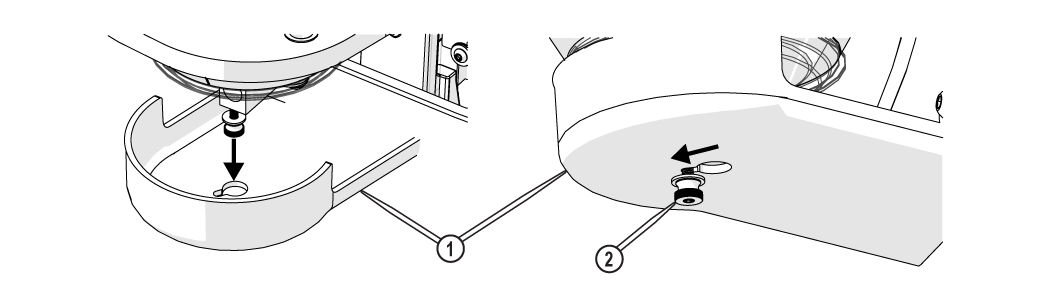
Figure 215
| 8. | Remove the shipping materials from the abrasive screen and place the garnet abrasive screen in the hopper. |
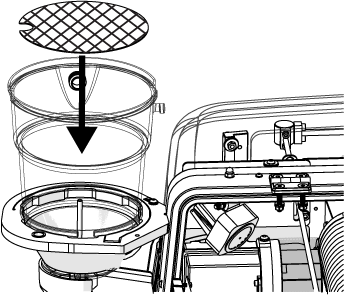
Figure 216
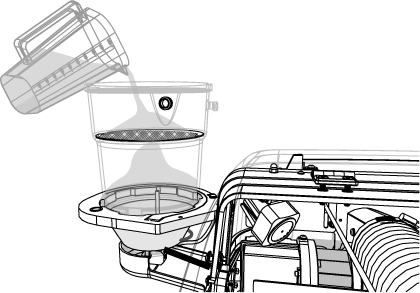
| 9. | Fill the hopper with garnet abrasive. |
Only use garnet abrasive purchased from OMAX.
| a. | Pour the garnet abrasive through the garnet abrasive screen into the hopper. |
Gently tap the hopper side to evenly settle the garnet abrasive in the hopper.
| b. | Place the hopper lid on the top of the hopper and secure the latching device. |
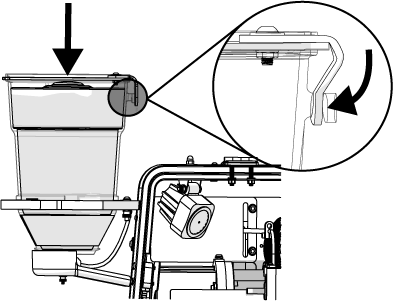
Figure 218
| 10. | Close the machine lid. |
| a. | Lift the lid and push support arm towards the back. |
Use care when opening or closing the lid to avoid injury. Never let the lid free-fall. Keep hand, fingers, or body parts away from the side of the table when closing the lid.

Figure 219
| b. | Lower the lid to the catcher tank. |